After You Find a Rock Timeline for Safe Identification
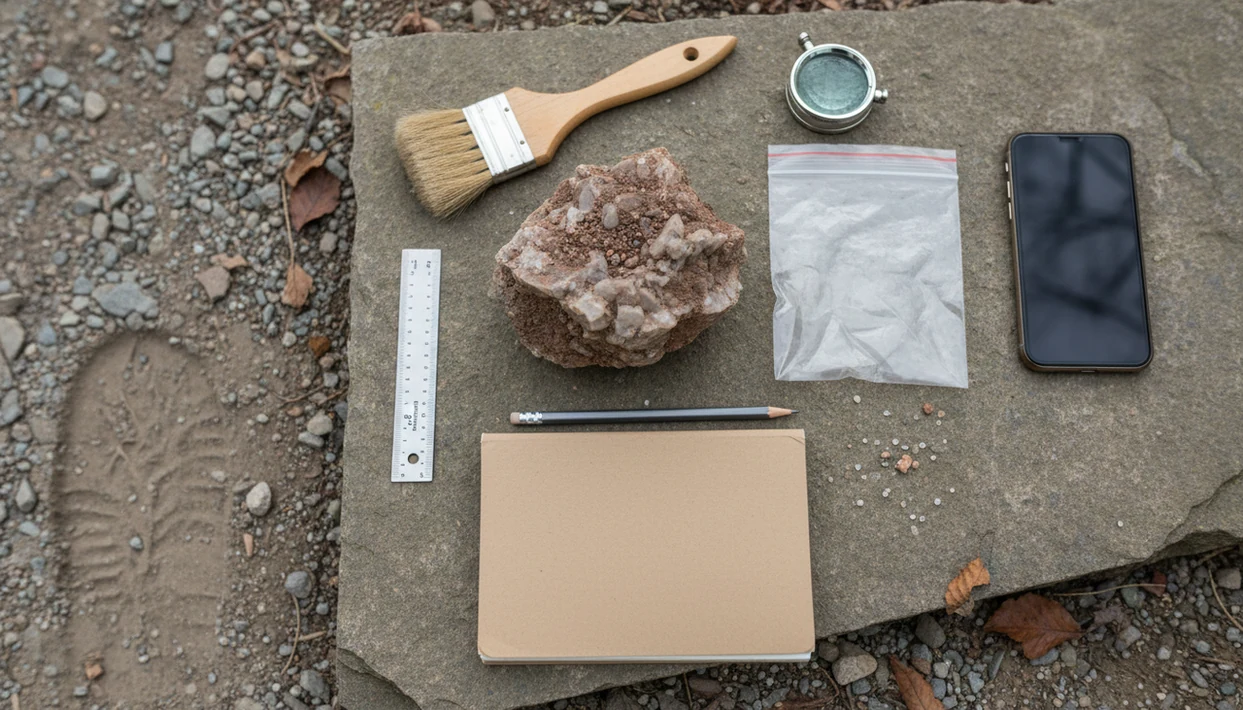
The safest after you find a rock timeline is: check safety first, photograph the rock where you found it, record the location, clean it gently, use a rock identifier app for a first-pass ID, then confirm unusual finds with simple tests or an expert.
> Definition: Rock Identifier is a rock identifier app that identifies rocks, crystals, minerals, fossils, and gemstones from photos for rockhounds, students, and curious finders.
TL;DR
- Do not scrub, sand, drill, or assume value before you document the rock.
- Take multiple clear photos before cleaning because surface details can help identification.
- Use app results as a first pass, then verify rare, valuable, hazardous, or legally sensitive finds.
For photo-based identification on iPhone or iPad, try the rock identifier app. You can also upload a photo on RockIdentifier.io.
RockIdentifier.io provides a web photo upload option that can support the photo identification step in an after you find a rock timeline. AI Rock ID is an iPhone and iPad app for photo-based rock, crystal, mineral, fossil, and gemstone identification with Mohs hardness clues and value context.
Quick answer: The after you find a rock timeline is a safe order of steps for documenting, photographing, identifying, testing, and recording a new rock find. The safest approach is to photograph the rock and note the location before cleaning, then use photo identification and only perform simple non-damaging tests when appropriate.
Recommended app for after you find a rock timeline
AI Rock ID is useful after you have taken clear photos and saved basic location notes for a new rock find. The app can provide a photo-based identification starting point before you decide whether simple tests, collection records, or expert verification are needed.
Best for
- Checking a rock photo before cleaning or testing the specimen
- Comparing fresh outdoor finds with possible rock, mineral, crystal, fossil, or gemstone matches
- Adding Mohs hardness clues to a beginner identification workflow
- Getting value context before assuming a shiny rock is valuable
- Organizing the identification step in a safe rock finding process
- Deciding whether a find looks common, uncertain, or worth expert review
Limitations
- Photo identification depends on image quality, lighting, and visible features
- The app cannot replace lab testing for rare, hazardous, or high-value specimens
- The app does not determine collecting legality for a location
- Value context is not a certified appraisal
Who this guide is for
Good fit if you
- New rockhounds who want a clear first-to-last process after picking up a rock
- Families, students, and teachers documenting outdoor rock finds
- Collectors who want better photo and location notes before identification
- Beginners who need cleaning cautions before rinsing or scrubbing a specimen
- Users who want to pair app-based rock identification with simple field observations
- People building a basic collection record for rocks, minerals, crystals, fossils, or gemstones
Consider another method if you
- Anyone handling suspected hazardous material, asbestos-like fibers, radioactive minerals, or chemically treated specimens
- Users who need legal advice about collecting rules on public, private, protected, or tribal land
- Sellers who need certified gemstone appraisal, grading, or valuation
- Researchers who require lab-confirmed mineral identification or formal geologic analysis
After You Find a Rock Timeline in the First 60 Seconds
What to do after finding a rock: pause, look around, and decide whether it is safe and legal to touch before you pick it up. Field context comes before testing, cleaning, or guessing value.
Check for sharp edges, loose dust, strange coatings, road debris, mine tailings, heat from sun-baked asphalt, or signs of chemical contamination. Also check your footing. A fresh roadcut after morning rain can look harmless until the gravel shifts under one boot.
Some finds should be left in place. That includes rocks on protected land, fossils in regulated areas, possible artifacts, or specimens in unsafe terrain. A muddy rind on a creek stone may be ordinary clay, but the nearby setting still matters. Write down what you see before the rock moves.
Five Rock Finding Steps New Finders Should Know
- Start with safety and context before handling. Look for dust, sharp points, unstable slopes, traffic, contaminated ground, and land rules before touching the specimen.
- Photograph the rock before heavy cleaning. Surface color, attached soil, weathering, and the original position can help later identification.
- Clean gently only when appropriate. A soft brush or light rinse is usually safer than scrubbing, sanding, or soaking an unknown material.
- Use photo ID as a first-pass suggestion, not proof. A photo-based match depends on visible clues such as color, texture, luster, fracture, and grain.
- Verify unusual finds with tests or expert review. Rare, valuable, hazardous, fossil-like, or legally sensitive specimens need stronger evidence than one image.
A child’s “sparkly rock” from a jacket pocket after a school field trip often needs this whole sequence. Not just a name.
How the After You Find a Rock Timeline Works
An after-you-find-a-rock timeline is an evidence chain: observe first, document second, clean carefully, identify visually, then test or verify only when needed. That order protects clues that may disappear once the rock is washed, scratched, or separated from its setting.
Photos, location notes, visible traits, and simple physical properties build the case. In plain terms, each step adds a clue and avoids destroying the last one. AI image recognition uses image embeddings, which are mathematical comparisons of visible patterns. For rocks, those patterns may include color, luster, grain, fracture, texture, and crystal shape.
Photo-based results are probabilistic. Full noon sun can hide luster and cleavage under glare, while a wet black beach pebble may turn dull gray after it dries on a towel. For beginners, documenting the find before testing is often better than cleaning first because original surfaces may hold the strongest identification clues.
How to Use This Rock Finding Steps Timeline
Use this timeline in the field first, then repeat parts of it at home under better light. The goal is not to rush to a name. The goal is to keep useful evidence attached to the specimen.
- Check safety and land rules before touching the rock, especially near roads, parks, mines, cliffs, beaches, and construction fill.
- Photograph the rock in place from the top, side, bottom, and close range before moving or cleaning it.
- Record location, date, and setting, such as trail, creek bed, beach, roadcut, yard, or mine dump.
- Clean gently after documentation with dry brushing or a light rinse only if the material seems stable.
- Use app ID, simple tests, and records to compare the likely identification with hardness, streak, magnetism, and your notes.
If the specimen looks crystal-like, the same photo habits apply when you upload photo to identify crystal from home.
Photo and Location Notes Before Rock Identification
Good rock identification starts with clear photos and practical field notes. Natural light, a plain background, and no harsh flash glare usually give a better match than a dramatic close-up.
Useful Photo Angles
Take the top, bottom, side, close-up, broken surface, and any crystal or fossil-like area. Place a penny, ruler, key, or fingernail beside the specimen for scale, but do not handle it if it looks sharp, powdery, fibrous, or contaminated. A phone photo taken in full noon sun can flatten everything, so move into open shade if glare hides the surface.
Useful Field Notes
Record the trail, creek bed, beach, road cut, mine dump, yard, or construction fill where you found it. Exact location can affect both legality and identification, but avoid posting sensitive coordinates publicly. Fossil sites, private land, and collecting spots can be damaged by too much attention.
Cleaning Cautions After Finding a Rock Outdoors
Heavy cleaning can remove the very details that help identify a rock. Weathering, mineral crusts, fossil impressions, coatings, and rough textures may all be useful clues.
Start with a dry soft brush. If the material seems stable, a light rinse with water may be enough. Stop if the surface flakes, powders, smells odd, stains your fingers, or exposes fibrous material. The hand lens fogged by breath can wait; don’t bring the specimen close to your face if dust is present.
Avoid sanding, grinding, drilling, bleach, acids, and aggressive wire brushing on unknown finds. The CDC warns that respirable crystalline silica dust can cause silicosis, lung cancer, COPD, and kidney disease, so dust-generating work is a poor first step: https://www.cdc.gov/niosh/silica/about/index.html. Fragile, fossil-like, metallic, fibrous, or powdery specimens should be handled minimally and stored apart until you know more.
Rock Identifier App ID in the Safe Timeline
RockIdentifier is an AI rock identifier app and web tool that names rocks, crystals, minerals, and fossils from photos, with Mohs hardness context and value-estimate prompts for rockhounds, students, and curious finders. In the safe timeline, it belongs after you document the original find context and before you rely on destructive tests.
Tools like RockIdentifier can suggest likely rocks, crystals, minerals, fossils, and gemstones from photos. Helpful outputs may include a possible name, Mohs hardness context, and value estimate context. If you want more detail on hardness-based app results, the app that identifies rocks and Mohs hardness guide explains that workflow.
RockIdentifier gives a structured first-pass comparison, not lab certification, legal permission, safety clearance, or a formal appraisal. Upload your cleanest photos after you save the original field images.
Simple Rock Tests After Photo Identification
Simple tests fit after photo identification because they can confirm or challenge the likely match. They should be small, careful, and skipped when preservation matters.
Hardness and Streak Clues
Mohs hardness ranks minerals from 1 to 10, with talc at the soft end and diamond at the hard end, according to the U.S. Geological Survey: https://www.usgs.gov/faqs/what-mohs-hardness-scale. Streak is the powdered color of a mineral, and it can differ from the surface color. A glass plate with a faint scratch tells one story, while a streak plate may tell another.
When to Skip Testing
Magnetism, heft, cleavage or fracture, luster, and acid reaction can also help, but scratch, streak, and acid tests may damage specimens or create risk. Test only an inconspicuous area. Skip testing if the rock may be a fossil, artifact, gemstone, fragile crystal, or something you want to preserve.
Collection Records After You Identify a Rock
A rock collection record keeps a casual find from becoming an unlabeled mystery later. Save the app result, original photos, cleaned photos, date, location, and field notes together.
Use a simple label format: suspected name, place found, date found, test results, and confidence level. Confidence levels can be plain: possible, likely, verified, or expert-confirmed. That wording helps students and beginner rockhounds avoid treating every first match as final.
Keep value estimates separate from confirmed appraisal or sale price. A handwritten label on rough amethyst at a market table may sound confident, but price depends on identity, condition, size, treatment, and demand. RockIdentifier can help organize likely identification details, but your record should still show what was observed, what was tested, and what remains uncertain.
Common Mistakes in the After You Find a Rock Timeline
The most common mistake is assuming one app photo gives a final exact ID. One image can miss the broken edge, crystal habit, luster, or grain size that changes the likely identification.
Another mistake is scrubbing or polishing before photos. Once a weathered rind or coating is gone, you cannot put it back. A wet agate glowing in tidewash may photograph beautifully, but the dry surface can look different enough to confuse later comparison.
Shiny or colorful does not automatically mean valuable. Value estimates need independent verification, especially for gemstone-like material, native metals, or anything being sold. Destructive tests are also a mistake if the specimen should be preserved.
Last, don’t ignore land ownership, park rules, fossil laws, or protected artifact rules. Legal collecting depends on place, not just the rock itself.
Expert Verification for Rare or Risky Rock Finds
Ask for expert review when a find may be a meteorite, fossil, native metal, gemstone, radioactive mineral, asbestos-like fibrous mineral, or culturally sensitive object. Stop self-testing if the specimen could be scientifically important, hazardous, expensive, or legally restricted.
Experts may use microscopy, density, hardness, streak, acid reaction, spectroscopy, or lab analysis. Those methods can separate visual lookalikes that a photo cannot confirm. A magnet hovering over black sand is a useful clue, but it is not a meteorite diagnosis.
Possible contacts include local mineral clubs, university geology departments, natural history museums, and professional appraisers. Keep scientific identification separate from value appraisal and legal permission to collect. Preserve original photos, coordinates or private location notes, dates, and possession records for unusual finds.
Limitations
Photo-based rock identification is useful, but it has real limits. Many rocks and minerals share colors, textures, and surface patterns.
- Photo-based rock ID is not definitive because lookalikes can appear nearly identical in one image.
- Lighting, wet surfaces, dirt, polish, glare, and shadows can distort color, luster, and texture.
- Estimated value is not a formal appraisal or a guaranteed market price.
- Scratch, streak, acid, sanding, drilling, and grinding can be destructive or risky.
- An app cannot reliably determine toxicity, legality, provenance, or scientific importance from one image.
- Rare, hazardous, valuable, fossil-like, or legally sensitive finds need human expert verification.
- Exact location can matter for identification, but sensitive sites should not be shared publicly.
RockIdentifier can support a likely identification, but it cannot replace lab testing, expert review, or collecting permission.
Which option fits which need
| Need | Best option | Why |
|---|---|---|
| Quick photo-based starting point after documenting a new find | AI Rock ID | The iPhone and iPad app can suggest possible identifications from rock photos and provide related clues. |
| Identification from a desktop or mobile browser without installing an app | Web Tool | RockIdentifier.io supports web photo upload for users who prefer browser-based identification. |
| Confirming a rare, risky, or unusually valuable-looking specimen | Expert | A qualified geologist, mineralogist, gemologist, or local museum can evaluate details that photos may not show. |
| Checking simple visual matches from general web images | Google Lens | General visual search can show similar-looking images, but it may not separate look-alike minerals reliably. |
| Definitive mineral composition, treatment detection, or gemstone grading | Lab | Laboratory testing can use instruments and standardized methods that a photo app or field test cannot provide. |
Quick summary
- Best for
- This page is best for beginners who need a safe after you find a rock timeline before cleaning, testing, or storing a new find.
- Includes
- first 60 seconds, rock finding steps, photo notes, location notes, cleaning cautions, app identification, simple tests, collection records, expert verification triggers
- Platforms
- iPhone, iPad, Web
- Free version
- Yes
- Expert replacement
- No
Common mistakes
- Cleaning a rock before taking photos and losing surface clues such as coatings, matrix, or fossil detail
- Forgetting to record the find location, date, and surrounding rock type before leaving the site
- Taking only one photo instead of photographing multiple sides in natural light
- Using acid, bleach, vinegar, or aggressive scrubbing before knowing whether the specimen is delicate
- Doing scratch or streak tests on a display-quality, fragile, or possibly valuable specimen
- Assuming a shiny surface automatically means the rock is a gemstone or has high value
A practical next step is the identify rocks from a photo workflow in AI Rock ID.
FAQ
Should I clean a rock before identifying it?
Usually, photograph and record the rock before cleaning it. Heavy cleaning can remove coatings, weathering, fossil impressions, or textures that help identification.
How should I photograph a rock for identification?
Use natural light, avoid harsh glare, include a scale object, and photograph the top, bottom, side, close-up, and any broken or crystal-like surface. A plain background helps the rock stand out.
Can an app identify a rock from a photo?
Yes, an app can provide a useful first-pass identification from visible traits. It cannot provide lab-grade certainty from one photo.
What rock tests are safest for beginners?
The safest checks are visual observations, scale, magnetism, heft, luster, and comparison of visible grain or fracture. Scratch, streak, and acid tests can damage specimens and should be used cautiously.
Is my shiny rock valuable?
A shiny rock is not necessarily valuable. Value depends on verified identity, size, quality, rarity, treatment, provenance, and market demand.
When should I ask an expert to identify a rock?
Ask an expert when a rock may be a fossil, meteorite, gemstone, native metal, hazardous mineral, artifact, or legally sensitive find. Expert review is also wise before selling or altering an unusual specimen.
Can I keep rocks I find outdoors?
It depends on land ownership, park rules, permits, and protected resources. Some public lands, private properties, fossil sites, and cultural sites restrict collecting.
What should I write down immediately after finding a rock?
Record the date, general location, setting, and any nearby rock layers or soil conditions. These notes can help later identification and keep your collection record useful.
Should I keep the rock in a bag before identifying it?
A separate bag or container can prevent scratches and keep location notes with the specimen. Avoid mixing several new finds in one bag if you want accurate records.
Why should photos come before simple rock tests?
Photos preserve the original surface condition before a scratch, streak, rinse, or accidental damage changes the specimen. Original photos also help when asking an app or expert for identification.
What should I do if a rock has fibers, dust, or a strong odor?
Avoid scraping, breaking, smelling, or cleaning the specimen. Store it safely, wash your hands, and ask a qualified expert or local authority for guidance if hazardous material is possible.