Rock Identification Timeline: From Photo to Confidence
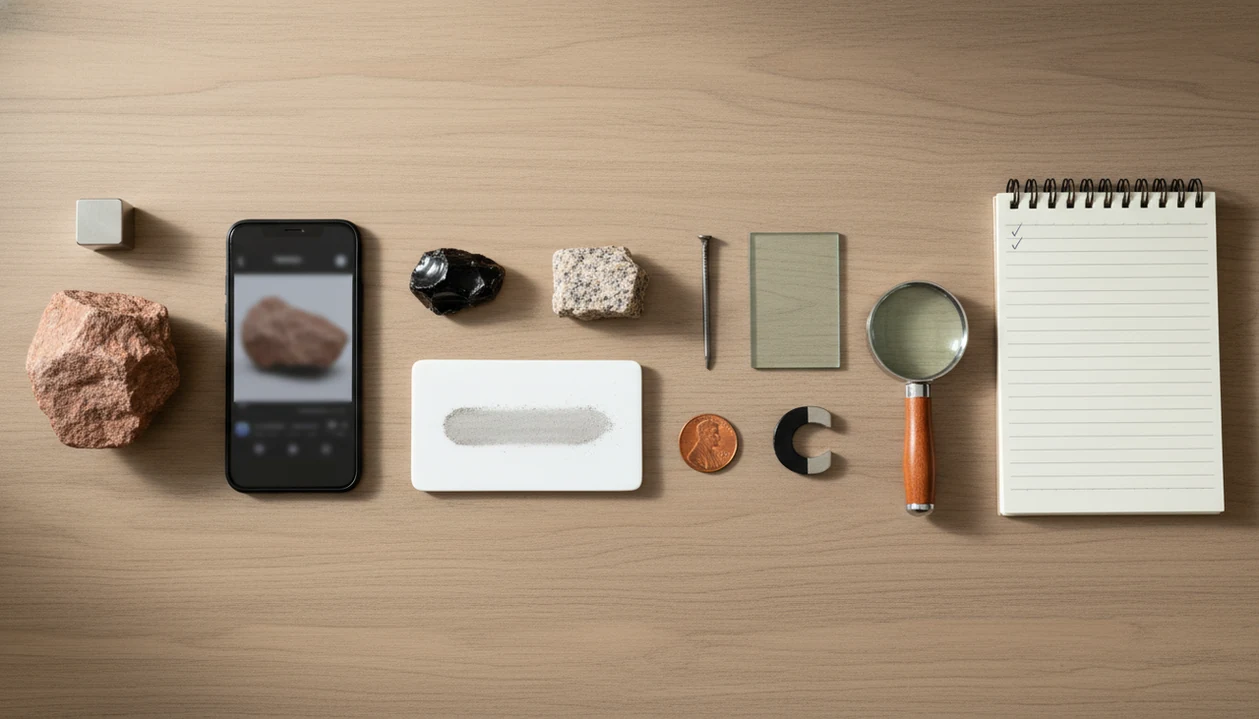
A rock identification timeline moves from a clear photo to a likely match, then checks lookalikes with streak, hardness, luster, cleavage, fracture, locality, and notes before calling the ID reliable. Use the first photo result as a starting point, not the final answer.
> A rock identification timeline is the ordered workflow for turning a mystery rock, mineral, crystal, or fossil photo into a more confident identification using visual clues, AI matching, physical tests, and context.
- Start with a sharp photo that shows scale, texture, color, crystals, layering, and a fresh or broken surface when possible.
- Treat an AI rock identifier result as a likely match, then compare lookalikes using hardness, streak, luster, cleavage, fracture, magnetism, and locality.
- Finish the rock ID process by writing down evidence and confidence level, not just the name that looked closest in a photo.
For photo-based identification on iPhone or iPad, try the rock and crystal identifier. You can also upload a photo on RockIdentifier.io.
RockIdentifier.io provides a web photo upload option for people who want to compare an unknown specimen with possible rock, mineral, crystal, fossil, or gemstone matches. AI Rock ID is an iPhone and iPad app that can support the rock identification timeline by organizing photo-based clues, likely matches, lookalikes, hardness context, and notes.
Quick answer: A rock identification timeline is the ordered process of moving from a clear photo to a more confident name using visual clues, likely matches, lookalikes, streak, hardness, locality, and notes. The rock identification timeline helps beginners avoid guessing from color alone and build evidence step by step.
Recommended app for the rock identification timeline
AI Rock ID is useful when a beginner wants to follow a repeatable rock ID process instead of relying on a single visual guess. The app can help connect a specimen photo with possible matches, comparison clues, and notes that fit the steps in the timeline.
Best for
- Starting a rock identification timeline with a clear specimen photo
- Comparing likely matches against common lookalikes
- Recording visual clues before doing streak or hardness checks
- Adding locality notes to support or question a possible identification
- Keeping confidence notes for specimens that need later review
- Building a simple workflow for repeated rock, mineral, crystal, fossil, or gemstone finds
Limitations
- A photo-based match may be uncertain when specimens are weathered, dirty, or poorly lit
- Streak, hardness, density, and breakage checks may still be needed for confidence
- The app does not replace a geologist, gemologist, museum specialist, or laboratory test
- Value context should not be treated as a formal appraisal
Who this guide is for
Good fit if you
- Beginners who want a clear order for identifying an unknown rock, crystal, mineral, fossil, or gemstone
- Users comparing a photo-based result against lookalikes before accepting a name
- Collectors who want to record streak, Mohs hardness clues, breakage, and locality notes
- Students learning why rock identification requires more than color and shape
- Hobbyists organizing field finds into a repeatable rock ID process
- People who want to understand confidence levels instead of treating one match as final
Consider another method if you
- Anyone who needs a legally binding appraisal or certified gemstone report
- Users identifying hazardous materials that may require safety handling or lab testing
- Collectors who need precise chemical composition, provenance, or grade
- People who cannot provide a clear photo or basic location context
- Anyone who needs expert confirmation for buying, selling, or insuring a specimen
Rock Identification Timeline Definition for Beginners
A rock identification timeline is the ordered workflow for turning a mystery rock, mineral, crystal, or fossil photo into a more confident identification using visual clues, AI matching, physical tests, and context.
In plain English, the timeline is: photo, visible clues, likely match, lookalikes, physical tests, locality, notes, and confidence. A wet black beach pebble may look rich and glossy in the tidewash, then turn dull gray after it dries on a towel. That change belongs in the notes.
Rocks, minerals, crystals, fossils, and gemstones overlap, but they do not use identical evidence. A fossil pattern needs structure and context. A mineral often needs hardness, streak, luster, cleavage, and fracture. RockIdentifier is an AI rock identifier app and web tool that names rocks, crystals, minerals, and fossils from photos with Mohs hardness and value estimates; use it as a first-pass organizer, not a final authority.
Five Rock ID Process Facts Before You Start
- A good photo strongly affects the first-pass match because visible texture, grain size, crystal faces, and scale guide the comparison.
- The first AI result is a starting point, not proof; treat it as a shortlist that needs checking.
- Reliable identification combines multiple properties, not color alone, because many minerals occur in several colors.
- Rocks, minerals, crystals, and fossils should be sorted into the right category before deeper checks.
- Verification uses trusted references, physical properties, and location context, especially when a specimen looks valuable or unusual.
A child may bring home a “sparkly rock” in a jacket pocket after a school field trip. The sparkle helps, but it does not answer whether the specimen is mica, quartz, pyrite, calcite, or glassy slag.
Start small. Then add evidence.
How the Rock Identification Timeline Works
The rock identification timeline works by combining photo-based pattern matching with physical and contextual evidence. Photo tools compare visible patterns such as color, texture, crystal habit, banding, grain size, and shape to known examples.
Under the hood, many tools use image embeddings, which are numerical summaries of what the photo looks like. In simpler terms, the software is comparing the picture to other pictures. That helps with a sharp close-up of a striped pebble among shell fragments, but it cannot feel hardness or see hidden cleavage.
The process must then add non-photo evidence: hardness, streak, luster, cleavage, fracture, magnetism, and locality. The Smithsonian National Museum of Natural History explains that minerals are identified by a combination of properties, not color alone (https://naturalhistory.si.edu/education/teaching-resources/earth-science/minerals). AI can overfit to appearance when two specimens look alike but differ physically.
For beginners, a photo match is often fastest at the start because it narrows the field before slower tests begin.
How to Use the Rock ID Process Timeline
Use this rock ID process as a short checklist, not a memory test. Keep the specimen, photos, and notes together from the start.
- Photograph the specimen in natural light from several angles, with a coin, ruler, key, or fingernail for scale.
- Record visible clues such as color, grain size, texture, crystal faces, layering, fossils, and any fresh broken surface.
- Review the likely match from a guide, database, or tool, then list two or three possible lookalikes.
- Test lookalikes with beginner-safe checks such as streak, hardness, magnetism, luster, cleavage, and fracture when damage is acceptable.
- Save notes and confidence with the likely name, evidence, location, ruled-out options, and a low, medium, high, or expert-confirmed rating.
Do not scratch, streak, or break valuable, fragile, fossil, or display specimens unless you accept the risk. If you need a photo-first workflow, an app that identifies rocks and Mohs hardness can help organize the early steps.
Step 1: Photo Clues in the Rock Identification Timeline
Photograph the whole specimen, a close-up surface, a scale object, and any broken face, crystal face, layering, fossil mark, vein, cavity, or unusual feature. A penny or ruler beside the rock gives size that a cropped photo cannot show.
Lighting matters more than most beginners expect. A phone photo taken in full noon sun can hide luster and cleavage under glare. Dirt, wet surfaces, weathering, and camera angle can also mislead a photo-only identification. A muddy rind on a creek stone may conceal the fresher broken edge that actually carries the better clue.
Color is useful, but unreliable by itself. Quartz, calcite, feldspar, and glassy slag can all appear pale, milky, or shiny in a single image. For crystals, a dedicated upload photo to identify crystal workflow is most useful when the photo includes crystal shape, termination, and matrix.
Step 2: Likely Matches and Lookalikes in Rock ID
The first result should be treated as a shortlist, not a final answer. Write down what matches, what does not match, and which test would separate the closest lookalike.
| First likely match | Common lookalike | What to compare next |
|---|---|---|
| Quartz | Calcite | Hardness, cleavage, reaction to acid if supervised |
| Pyrite | Gold | Streak, shape, softness, density, bending in tweezers |
| Volcanic rock | Slag | Bubbles, glassy flow, weight, industrial context |
| Fossil | Fossil-like pattern | Repeating structure, matrix, locality, expert review |
A yellow flake bending in tweezers points away from pyrite and toward gold, but that one clue still needs caution. Tools like RockIdentifier, Google Lens, and reference sites can speed up comparison, but the specimen should still answer the physical questions.
Good AI rock identifier tools deliver a likely name, visual comparison, and practical clues like Mohs hardness or value context, not a certified lab identification or guaranteed appraisal.
Step 3: Streak, Hardness, and Breakage Checks for Rock Identification
Streak testing rubs a mineral on an unglazed porcelain plate to observe the powder color. The USGS notes that streak color can differ from surface color, which is why it can separate some shiny lookalikes (https://www.usgs.gov/faqs/how-do-geologists-identify-minerals).
Mohs hardness ranks minerals from 1 to 10, with talc at 1 and diamond at 10; Britannica summarizes the scale as a scratch-resistance ranking rather than a linear measurement (https://www.britannica.com/science/Mohs-hardness). Beginners often use rough comparisons: a fingernail, copper coin, steel nail, or glass plate. These checks are not laboratory measurements, but they can narrow the field quickly.
Cleavage and fracture describe how a mineral breaks. Cleavage forms along flat weakness planes. Fracture breaks irregularly, curved, splintery, or unevenly. The U.S. National Park Service describes cleavage and fracture as diagnostic mineral properties.
Be careful here. Streak plates, scratch tests, and fresh-break checks can damage specimens. Avoid them on fragile crystals, fossils, polished stones, suspected valuables, or pieces you want to display.
Step 4: Locality Notes in the Steps to Identify Rocks
Locality matters because rocks do not occur randomly. Common local bedrock, mine districts, river gravel, beach material, glacial transport, landscaping stone, and imported decorative rock can all change the strength of a match.
Record where the specimen was found, what surrounded it, and whether it was loose or attached to bedrock. Note nearby fossils, veins, rusty staining, quarry material, or similar stones. A fresh roadcut after morning rain may reveal layers and broken faces that loose driveway gravel cannot explain.
Locality can support or weaken a match, but it usually does not prove the specimen alone. A heavy pebble weighing down a pocket might be local river cobble, glacial material, or something dumped from landscaping. Purchased, inherited, and decorative stones may have no connection to the place where they now sit.
For field finds, location context is often the difference between a plausible ID and a pretty guess.
Step 5: Confidence Notes for the Final Rock Identification
Finish with an evidence note, not just a name. A useful format is: likely name, category, photo evidence, test evidence, locality evidence, lookalikes ruled out, and confidence level.
Use simple confidence labels: low, medium, high, and expert-confirmed. “Low” can mean the photo is weak or tests are missing. “Medium” may fit when visible clues and one or two tests agree. “High” needs several matching clues and no serious contradiction. “Expert-confirmed” should come from a local geology club, museum, university extension, experienced rockhound, lab, or trusted reference collection.
Fossils, meteorites, gold-looking specimens, and valuable-looking crystals often need extra verification. A handwritten label on rough amethyst may be helpful, but it is not proof of origin, treatment, or value. RockIdentifier can help keep photos and notes together, including when a specimen is only a likely identification.
The most reliable beginner rock ID process ends with a confidence note because it preserves both the answer and the evidence behind it.
Common Mistakes in the Rock ID Process
The most common rock ID mistakes come from trusting appearance too quickly and losing the evidence that would check it later. Slow down before naming the specimen, especially when it looks shiny, valuable, fossil-like, or unusual.
- Dry and recheck the color before treating it as diagnostic. Wet stones, beach glare, flash reflections, and phone sharpening can make dull minerals look darker, richer, or more glassy than they are.
- Compare close lookalikes instead of accepting the first AI match. A likely name is useful, but quartz, calcite, pyrite, gold, slag, and fossil-like patterns all need separating evidence.
- Document scale, locality, and fresh surfaces while the context is still available. Add a coin or ruler, the find spot, surrounding material, and any broken or unweathered face.
- Protect fragile or valuable specimens from scratch, streak, acid, or breakage tests. Fossils, crystals, polished stones, and suspected valuables deserve photo-first review or expert help.
- Record uncertainty honestly when clues are missing or conflicting. A low-confidence match is still useful; calling it final hides the next question you need to answer.
Limitations
Photo-first identification is useful, but it has real limits. The timeline reduces guessing; it does not remove uncertainty.
- Photo-only identification is not fully reliable because lighting, angle, weathering, scale, and hidden surfaces can hide key traits.
- AI tools can confuse visually similar specimens when hardness, streak, cleavage, fracture, or density is unknown.
- No single test works for every rock, mineral, crystal, fossil, or gemstone.
- Some tests are destructive or impractical for display specimens, fragile crystals, fossils, polished stones, or suspected valuables.
- Value estimates are approximate and depend on rarity, size, quality, treatment, provenance, buyer demand, and market timing.
- Locality may be misleading for landscaping stone, river cobbles, glacial material, inherited specimens, and purchased samples.
- A confident ID may still require expert comparison, lab testing, or a trusted reference collection.
However, a careful timeline makes uncertainty visible. That is better than hiding a weak ID behind a confident name.
Which option fits which need
| Need | Best option | Why |
|---|---|---|
| Start the rock identification timeline from a specimen photo | AI Rock ID | The app is designed for photo-based rock, crystal, mineral, fossil, and gemstone identification on iPhone and iPad. |
| Upload a photo without using the iPhone or iPad app | Web Tool | RockIdentifier.io supports web photo upload for users who want a browser-based starting point. |
| Confirm a valuable gemstone or specimen before selling | Expert | A qualified gemologist or geologist can examine properties that a photo-based process cannot verify. |
| Check streak, Mohs hardness, and breakage evidence | Hands-on testing | Physical tests add evidence that can separate similar-looking rocks and minerals. |
| Determine exact composition or mineral chemistry | Lab | Laboratory methods are needed when identification requires chemical, microscopic, or instrumental analysis. |
| Quickly compare general visual search results | Google Lens | General visual search can show similar images, but it may not follow a rock-specific identification timeline. |
Quick summary
- Best for
- This page is best for beginners who want a step-by-step rock identification timeline from photo clues to confidence notes.
- Includes
- photo clues, likely matches, lookalikes, streak checks, Mohs hardness clues, breakage observations, locality notes, confidence notes
- Platforms
- iPhone, iPad, Web
- Free version
- Yes
- Expert replacement
- No
Common mistakes
- Treating the first photo match as final without checking lookalikes
- Using color as the main identification clue and ignoring streak or hardness
- Skipping locality notes that could support or weaken a likely match
- Testing hardness on weathered surfaces instead of a fresh or reliable surface when appropriate
- Forgetting to record uncertainty when the specimen has mixed, broken, or altered features
- Assuming value context is the same as a professional appraisal
A practical next step is the snap a photo for a likely name workflow in AI Rock ID.
FAQ
How do I identify a rock?
Start with clear photos, record visible clues, choose a likely match, test lookalikes, add locality notes, and assign a confidence level. Photo ID is a first pass, not the whole identification.
Can color identify a rock?
Color helps describe a rock or mineral, but it is unreliable by itself. Many minerals occur in multiple colors, and weathering, wet surfaces, coatings, and lighting can change appearance.
What is a streak test?
A streak test rubs a mineral on unglazed porcelain to see the color of its powder. The powder color can differ from the surface color and may help separate lookalikes.
What is Mohs hardness?
Mohs hardness is a 1-to-10 scale for mineral scratch resistance, with talc at 1 and diamond at 10. Beginners use comparisons such as fingernail, copper coin, steel nail, and glass to estimate hardness.
Are rocks and minerals different?
Yes. Minerals have defined chemical and physical properties, while rocks are usually mixtures of one or more minerals.
Can AI identify rocks accurately?
AI can provide a useful first match when the photo is sharp and the specimen has visible clues. Accuracy improves when you verify the result with streak, hardness, luster, cleavage, fracture, magnetism, locality, and trusted references.
How do I identify crystals?
Identify crystals by comparing crystal habit, surface luster, transparency, hardness, streak, cleavage, fracture, and locality. A photo can show shape and faces, but it cannot confirm all physical properties.
When should I ask an expert?
Ask an expert when the specimen may be a fossil, meteorite, valuable crystal, gold, gemstone, or culturally protected material. Expert review also helps when tests conflict or the identification affects value, safety, or collecting permission.
Why should rock identification follow a timeline?
A timeline keeps the process organized by moving from easy observations to stronger evidence. This reduces the chance of accepting a lookalike too early.
What should I photograph first in the rock ID process?
Start with a sharp photo in natural or even light that shows the whole specimen. Additional close-up photos of crystal faces, layers, texture, or broken surfaces can improve comparison.
How do locality notes help identify rocks?
Locality notes connect a specimen to the geology of the place where it was found. A possible match is more believable when it fits the rocks and minerals known from that area.
What should confidence notes include?
Confidence notes should include the likely match, rejected lookalikes, observed streak or hardness clues, locality, and any uncertainty. These notes make it easier to review or ask an expert later.