How to Identify Fossils from Photos
How to identify fossils from photos starts with sharp images, scale, and context from the host rock. Use the photo result as a shortlist, then verify with morphology, matrix, and simple field observations.
Download Fossil IdentifierDrop a rock photo here or tap to upload
JPG, PNG, WebP, HEIC • Max 50 MB • 1 free scan per day

Analyzing your specimen…
Quick answer: How to identify fossils from photos is best done by photographing the specimen sharply with scale, multiple angles, and visible host rock context. Photo identification can suggest likely fossil groups such as shells, corals, crinoids, ammonites, or plant impressions, but the result should be checked against morphology, matrix, locality, and simple physical observations.
AI Rock ID is relevant to how to identify fossils from photos because it can provide a first-pass visual shortlist from fossil-like shape, texture, and matrix clues. RockIdentifier.io supports the same topic by allowing web photo uploads for quick fossil checks when a user has clear images of the specimen and surrounding rock.
Quick summary
- Best for
- Beginners, collectors, hikers, students, beachcombers, field trip groups
- Works on
- Fossil shells, imprints, molds, casts, corals, crinoids, ammonites, trilobites, plant impressions
- Accuracy
- Most useful for common fossils with clear shape and repeating structure; less reliable for worn fragments, concretions, polished pieces, and photos without scale or matrix.
- Needs confirmation
- Yes
- Professional replacement
- No
- Platforms
- iPhone, iPad, Web
This guide is best for
- Beginners trying to decide whether a rock-like object is likely fossil, mineral texture, or concretion
- Collectors sorting common fossil finds from beaches, quarries, riverbeds, or field trips
- Students learning to compare visible fossil morphology with matrix and bedding clues
- Hikers who want a first-pass fossil group before researching local geology
- People photographing inherited or unlabeled fossil collections for preliminary organization
- Anyone comparing shells, corals, crinoids, molds, casts, and imprints from clear photos
Consider another approach if you
- Rare or scientifically important specimens that need expert documentation
- Specimens needing legal, museum, insurance, or commercial appraisal decisions
- Heavily worn pebbles or fragments with no clear repeating biological structure
- Finds with unknown locality where age and formation are essential to identification
- Prepared, repaired, polished, or altered fossils that require hands-on inspection
To identify fossils from photos, capture the fossil surface, side profile, and surrounding matrix with a scale object in view. Look for diagnostic biological patterns such as ribs, pores, chambers, bilateral symmetry, segmentation, or growth lines. Photo identification is strongest for common fossil groups and weakest for worn fragments, concretions, and polished specimens.
What Is How to Identify Fossils from Photos?
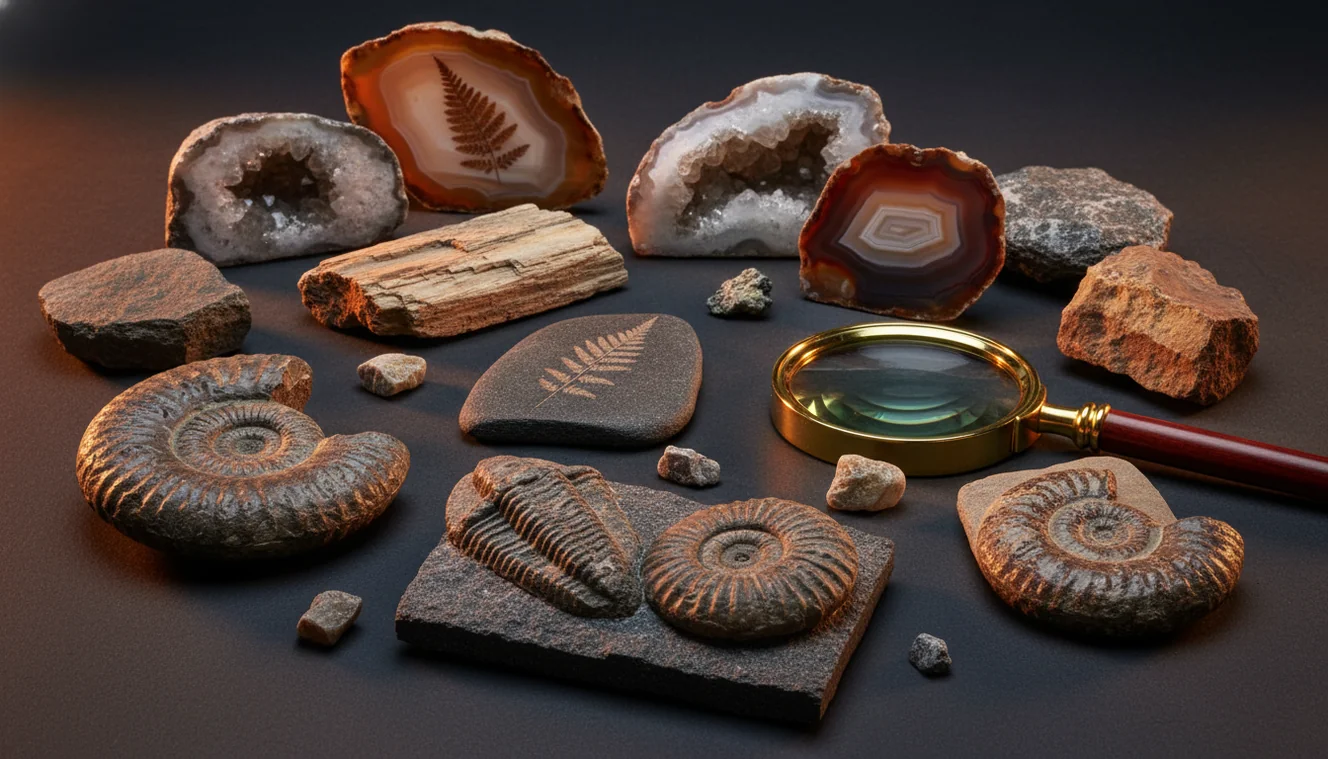
How to identify fossils from photos is a photo-based workflow for matching visible morphology to likely fossil groups such as brachiopods, crinoids, corals, ammonites, trilobites, shells, or plant impressions. The key is not just the object itself; the matrix rock, bedding, grain size, relief, and fracture texture often decide whether you are seeing a fossil, a cast, a mold, or a sedimentary structure.
A useful fossil photo shows scale, texture, and geologic context. Repeating pores, septa, chamber walls, hinge lines, and consistent ribbing matter more than color, which is easily shifted by iron staining or lighting. For terminology and fossil basics, the USGS has a concise reference at https://www.usgs.gov/faqs/what-fossil. Use the Rock Identifier iOS app link on the page for a quick first-pass scan; photos are processed for ID in a privacy-friendly workflow.
How to Identify Fossils from Photos Works
Photo fossil identification works by comparing visible shape, texture, and context against known fossil and rock patterns. The scanner evaluates the specimen outline, surface relief, repeated structures, color zones, and the relationship between the fossil-like feature and the host rock. A crinoid stem may show stacked circular columnals; a coral may show repeated corallites or septa; a brachiopod may show bilateral shell symmetry and ribbing.
The mechanism is probabilistic, not absolute. A photo can suggest candidate groups, but it cannot directly test hardness, acid reaction, specific gravity, or microscopic shell structure. That is why the best workflow pairs image matching with field notes: locality if known, sedimentary layer, limestone versus shale matrix, whether the feature is raised or recessed, and whether the pattern continues consistently across broken surfaces.
How to Use a Fossil Photo Identifier
1. Shoot in soft light
Place the specimen in diffuse daylight or shade, not direct sun. Avoid flash glare because it erases fine ribs, pores, septa, and growth lines.
2. Add scale and matrix
Include a ruler, coin, or grid card in at least one image. Keep some host rock visible so bedding, grain size, and weathering context are not lost.
3. Capture three angles
Take a top-down photo, a 45-degree relief view, and a side profile. The side view helps separate a raised fossil, an internal mold, a stain, and a concretion.
4. Crop tightly but not blindly
Crop close enough to show diagnostic texture, but leave enough surrounding rock to show whether the pattern is biological or part of the sediment.
5. Check the shortlist
Compare the returned candidates against physical clues such as calcite reaction, fracture, shell thickness, silicified texture, and whether repeating structure is consistent.
When to Use How to Identify Fossils from Photos (and When Not To)
Use it when
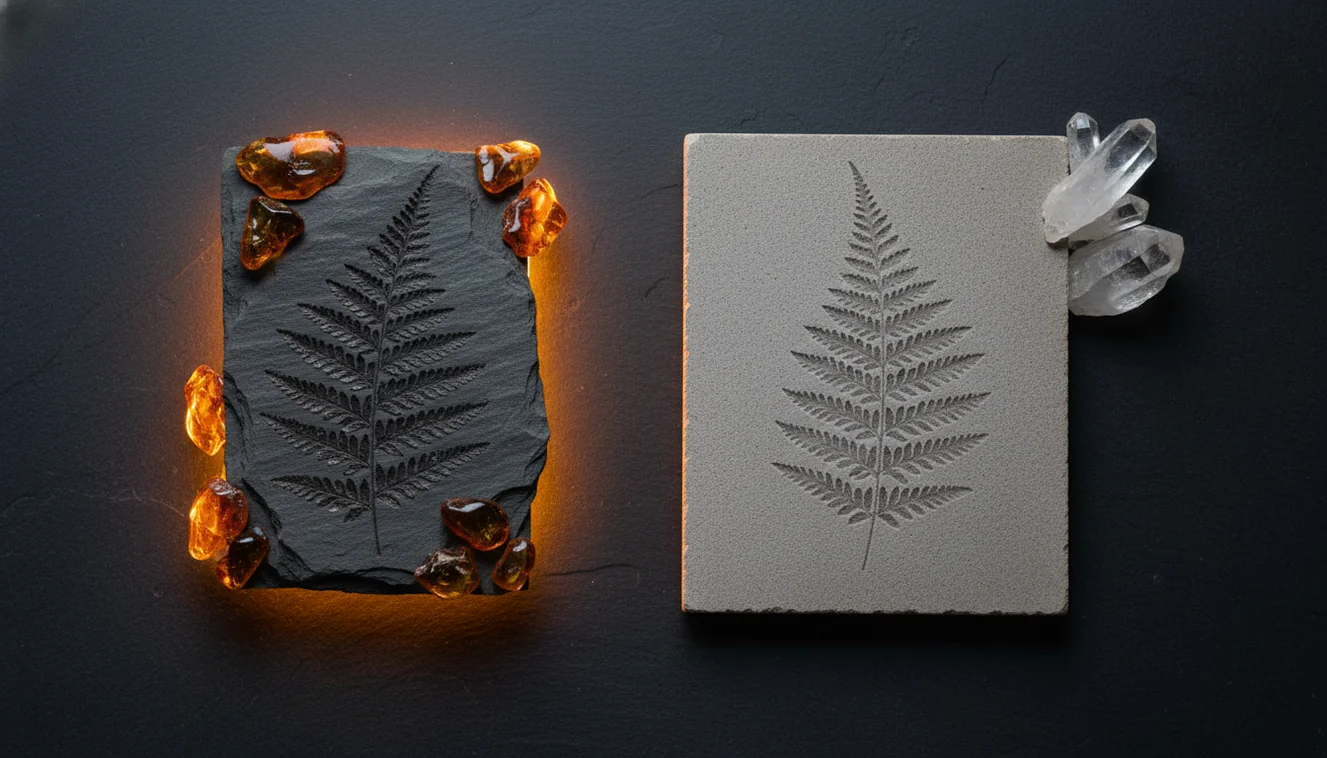
- Use it when the fossil shows clear morphology such as ribs, pores, chambers, shell symmetry, segmented parts, leaf venation, or crinoid columnals.
- Use it for quick sorting after a beach walk, quarry visit, classroom activity, estate collection review, or field trip where many specimens need a first-pass label.
- Use it when you have multiple angles and can show the matrix rock, especially limestone, shale, sandstone, chert, or iron-stained sediment.
- Use it when you need to distinguish broad groups first, such as coral versus crinoid, shell versus brachiopod, or fossil imprint versus mineral texture.
- Use it before deeper research so you can search the right fossil group, geologic age, and local formation rather than starting from a vague description.
Skip it when
- Do not treat a single photo as a final scientific identification for rare, legally sensitive, or museum-grade specimens.
- Do not rely on it for heavily worn pebbles, broken fragments with no repeating structure, or specimens photographed without scale.
- Do not use it as a substitute for locality data when age and formation are essential to the identification.
- Do not expect it to confirm preparation history, repair, enhancement, or commercial value from an image alone.
- Do not assume every round, ribbed, or spiral pattern is biological; concretions, liesegang bands, root casts, and tool marks can mimic fossils.
How to Identify Fossils from Photos vs Google Lens and Stone Identifier
| Feature | Rock Identifier | Google Lens | Stone Identifier |
|---|---|---|---|
| Best use | Fast photo-based fossil, rock, mineral, crystal, and gemstone screening in one workflow | General visual web search for similar-looking images and pages | Rock and crystal scanning with less fossil-specific context |
| Fossil context | Considers fossil-like morphology alongside matrix and mineral look-alikes | May match decorative objects, stock photos, or unrelated visual shapes | Useful for mineral texture, but fossil morphology may be secondary |
| Field practicality | Good for quick candidate groups when you have multiple specimen photos | Good for broad visual exploration when you want web examples | Good for casual rock or crystal checks |
| Verification need | Still needs scale, locality, matrix, and physical checks for confidence | Needs extra filtering because visually similar web results can be misleading | Needs fossil guide confirmation for shells, corals, molds, and trace fossils |
| Best limitation to remember | Photo quality and preserved detail control the result | Search results are not the same as specimen identification | May underperform on fossils compared with ordinary minerals or stones |
For fossil work, the best tool is usually the one that keeps you focused on diagnostic morphology rather than only visual similarity. Google Lens can surface useful comparison images, but it often matches color, outline, or internet popularity. A rock or crystal scanner can help with the matrix, yet fossils need biological structure checks: symmetry, repeated chambers, pores, septa, hinge lines, and relief. Use any table result as a triage aid, then confirm with locality and hands-on observations.
Photo Fossil Identification Use Cases
- Beach and river finds: Photo identification is useful when water-worn pieces still show shell ribs, coral pores, crinoid disks, or ammonite curves. Add a side photo because rounded pebbles can hide whether the feature is a true fossil or only a weathering pattern.
- Classroom specimen sorting: Teachers and students can sort mixed fossil trays into broad groups before using a hand lens or local fossil guide. The process reinforces morphology terms such as bilateral symmetry, radial symmetry, segmentation, septa, and bedding plane.
- Collection cataloging: A collector can use photo-based lookup to add provisional names to unlabeled drawers or inherited specimens. The label should remain provisional until locality, formation, and physical properties support the match.
- Fossil versus rock impostors: The workflow is helpful when a specimen might be a concretion, nodule, dendrite, root cast, mineral vein, or sedimentary structure. Showing matrix and broken edges often reveals whether the pattern is biological or inorganic.
- Travel and field triage: A fast phone photo can help decide which finds deserve careful wrapping, better photography, or local expert review. Always follow land rules and collecting restrictions, especially in parks, protected sites, and scientifically important exposures.
How to Identify Fossils from Photos Limitations
- Treated stones, coated fossil pieces, dyed specimens, resin-filled cracks, and acid-prepped surfaces can alter color and texture enough to mislead a photo result.
- Polished specimens often lose relief, fracture context, and matrix clues, so ammonites, corals, petrified wood, and shell fossils may look more like decorative stone than field fossils.
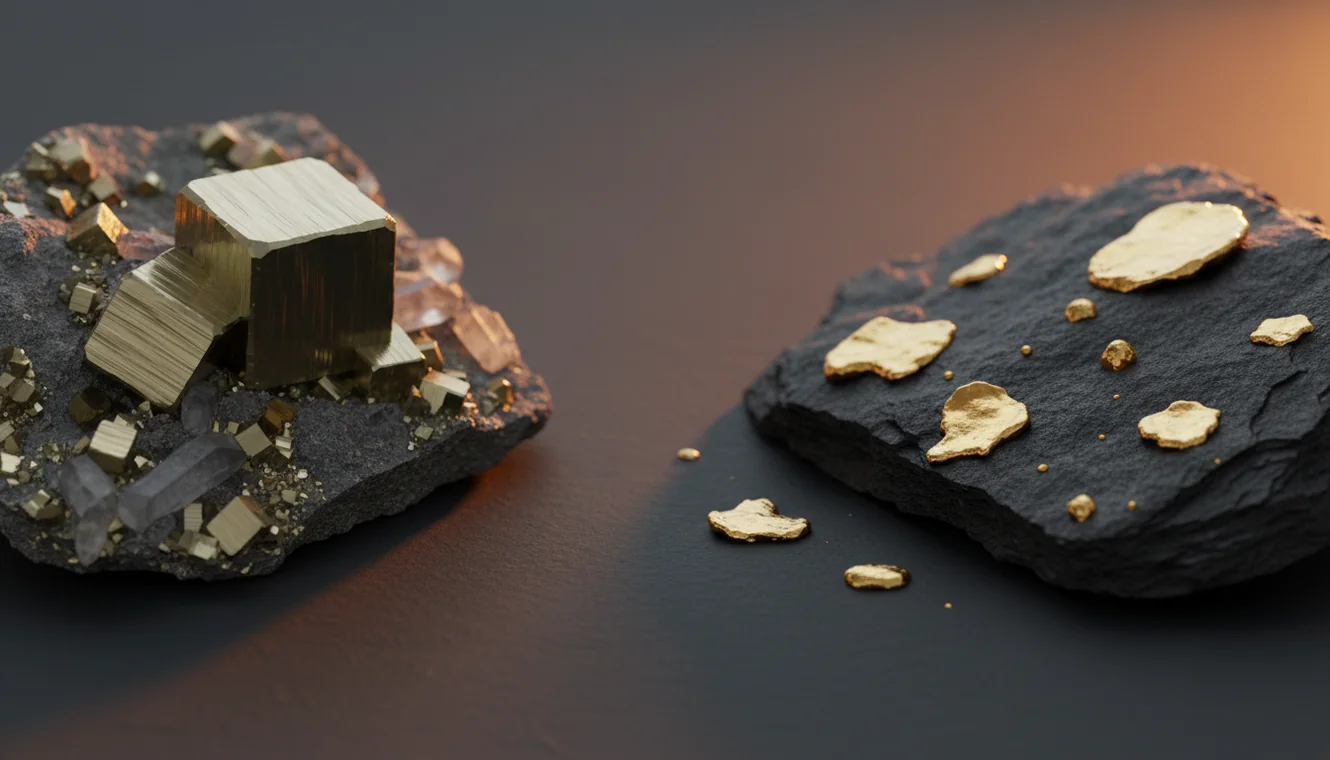
- Rare minerals and unusual preservation styles can confuse the result because mineral replacement, pyritization, silicification, and calcite infill may dominate the image.
- Photo quality matters: blur, glare, low resolution, harsh shadows, wet shine, edge distortion, and missing scale can hide the diagnostic structures needed for identification.
- Value estimates are not reliable from photos alone; price depends on authenticity, preparation, completeness, legality, provenance, rarity, size, repair, and market demand.
- Partial fragments are hard to identify when they lack repeated biological structure such as pores, septa, shell ornament, chambers, growth lines, or segmentation.
- Locality and formation can be decisive. Two fossils may look similar in photos but belong to different ages or groups when the geologic setting is considered.
Common mistakes
- Photographing only the fossil-like pattern and cropping out the host rock removes important matrix clues.
- Using flash or harsh sunlight can hide fine ribs, pores, septa, chambers, and growth lines.
- Assuming every round or spiral mark is a fossil can lead to confusing concretions, stains, or sedimentary structures with biological remains.
- Taking only one top-down image makes it harder to tell a raised fossil from a mold, cast, stain, or fracture surface.
- Ignoring scale makes shell size, crinoid column diameter, coral corallite spacing, and imprint proportions harder to judge.
- Cleaning aggressively before identification can remove fragile fossil surfaces or diagnostic sediment details.
- Treating a photo match as a species-level identification without checking locality, formation, and physical features can overstate the result.
Use Photo Fossil Identification as a First-Pass Check
How to identify fossils from photos works best when images include scale, multiple angles, and surrounding matrix. Use the photo result as a starting point, then confirm it with morphology, locality, and simple field observations.
Related Articles


Frequently Asked Questions
Can photos identify fossils accurately?
Photos can identify many common fossils to a broad group when the image shows diagnostic structure and matrix context. Accuracy drops for worn fragments, polished pieces, and specimens with no scale or locality information.
What angles should I photograph?
Take a straight-on view, an angled relief view, and a side profile. Include the surrounding matrix and a scale object in at least one image.
Do I need location information?
Location is not always required for a first-pass match, but it can greatly improve confidence. Formation, region, and rock layer help separate fossils that look similar in photos.
Is it fossil or concretion?
A fossil usually shows consistent biological structure such as ribs, pores, chambers, symmetry, or segmentation. A concretion is more likely to be rounded, smooth, irregular inside, and lacking repeated anatomy.
Should I clean it first?
Light brushing or a gentle rinse is usually enough before photography. Avoid scraping, acid, wire brushes, or aggressive cleaning because they can remove the very texture needed for identification.
Can polished fossils be identified?
Sometimes, especially if shell structure, coral pattern, wood grain, or ammonite chambers remain visible. Polishing can also remove relief and matrix clues, so unpolished edges and side views are helpful.
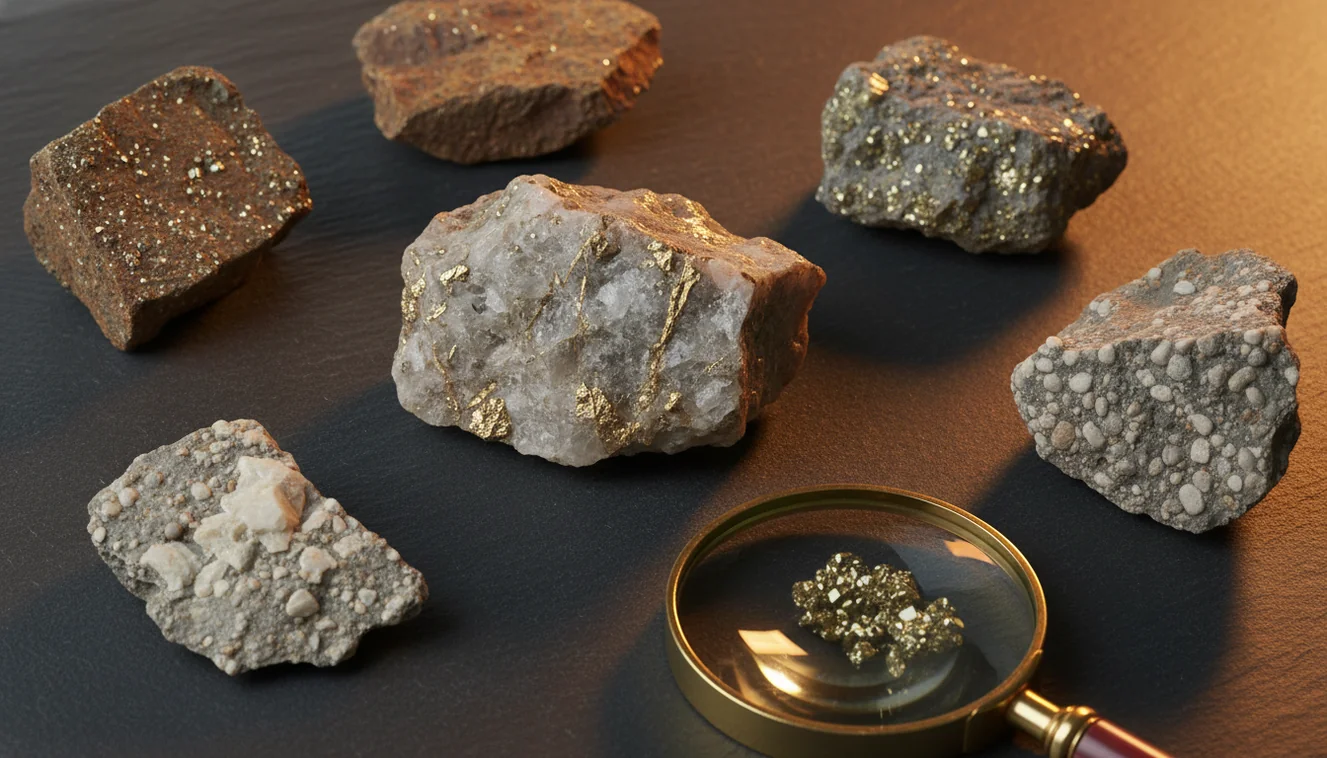
Why did it say mineral?
Many fossils are preserved by mineral replacement, commonly calcite, silica, or pyrite. If the matrix dominates the photo or the fossil texture is faint, the result may lean toward the mineral instead of the organism.
Can I get a value estimate?
A photo can suggest what the specimen might be, but it cannot reliably establish value. Appraisal depends on authenticity, completeness, rarity, preparation quality, legal provenance, and comparable sales.
What fossils are easiest?
Clear ammonites, brachiopods, crinoid stems, corals, trilobite fragments, shark teeth, and shell impressions are often easier from photos. They tend to show recognizable shapes or repeated structures that survive normal weathering.