How to Identify Gemstones From a Photo
Use a clear gemstone photo to generate a practical identification shortlist, then confirm with simple mineral tests such as hardness, streak, cleavage, and specific gravity. AI Rock ID is useful for fast sorting, not for replacing gemological testing.
Download Gemstone IdentifierDrop a rock photo here or tap to upload
JPG, PNG, WebP, HEIC • Max 50 MB • 1 free scan per day

Analyzing your specimen…
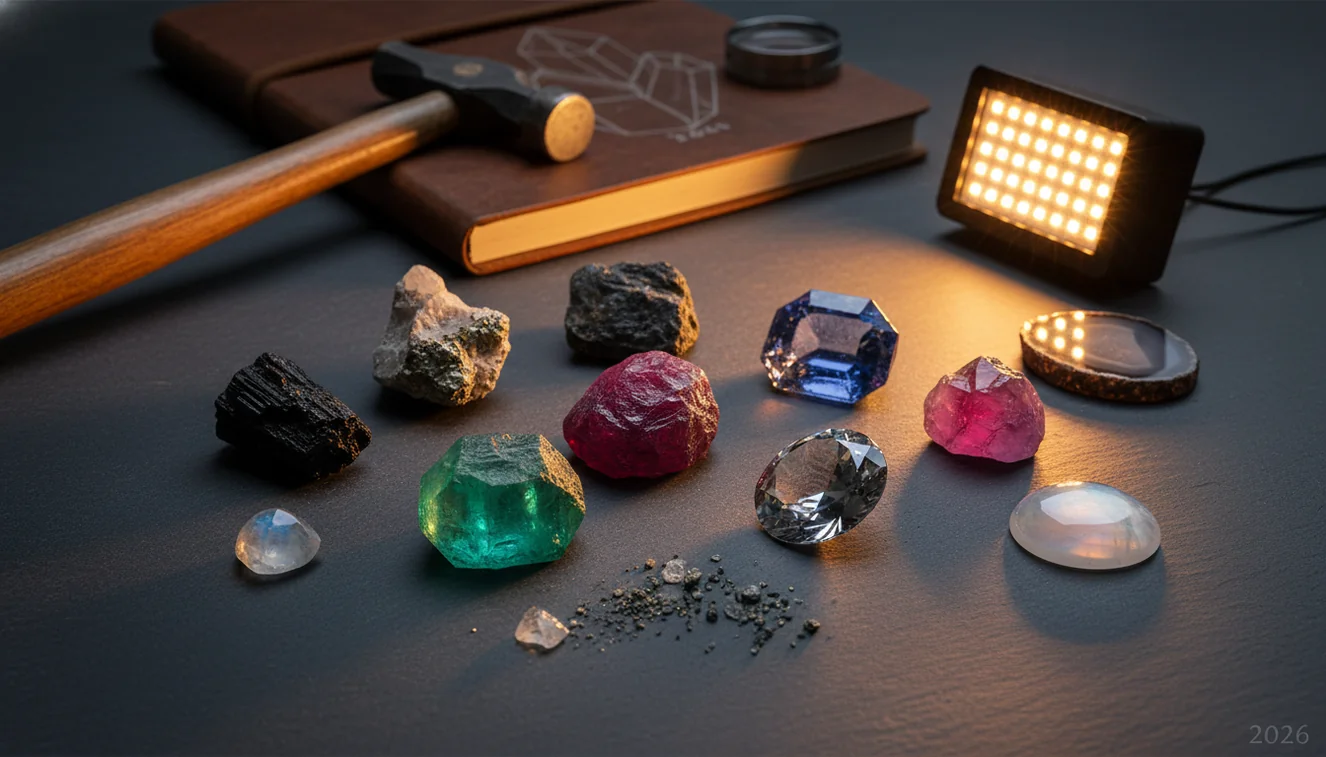
Quick answer: How to identify gemstones from a photo: use a sharp, well-lit image to generate a likely shortlist, then compare the result with visible traits such as luster, transparency, banding, cleavage, and inclusions. Photo identification can narrow common gemstone possibilities, but hardness, streak, specific gravity, and gemological tests are needed when value, treatment, or authenticity matters.
AI Rock ID can help users identify gemstones from a photo by producing a visual shortlist that should be checked with mineral tests. RockIdentifier.io provides a web photo upload option for gemstone photo identification when users want a browser-based starting point.
Quick summary
- Best for
- Collectors, beginners, hobbyists, field learners, tumbled stone sorters
- Works on
- Gemstones, minerals, crystals, tumbled stones, rough specimens, opaque decorative stones
- Accuracy
- Useful for narrowing common visual matches, but not reliable as final proof for valuable, treated, synthetic, or mounted stones
- Needs confirmation
- Yes
- Professional replacement
- No
- Platforms
- iPhone, iPad, Web
This guide is best for
- Beginners learning how to identify gemstones from a photo before doing physical tests
- Collectors sorting mixed tumbled stones, cabochons, or estate-sale specimens
- Hobbyists comparing quartz, agate, jasper, calcite, fluorite, garnet, and other common gem materials
- Field learners who need a quick shortlist before checking hardness, streak, or cleavage
- People photographing rough or polished stones with visible color zoning, banding, matrix, or crystal texture
- Educators explaining why photo ID is helpful but not the same as gemological confirmation
Consider another approach if you
- Anyone making high-value buying, selling, insurance, or appraisal decisions
- Users trying to prove whether a gemstone is natural, synthetic, dyed, stabilized, or heat-treated from a photo alone
- People identifying mounted jewelry where the setting hides key diagnostic features
- Anyone needing a laboratory-grade result for corundum, diamond, jade, turquoise, emerald, or other commonly treated gems
To identify gemstones from a photo, take sharp images in diffuse light, upload the clearest view, and compare the top matches against visible traits like luster, transparency, color zoning, cleavage, and inclusions. A photo can narrow the possibilities quickly, but hardness, streak, specific gravity, and refractive-index testing are needed when the result affects value or authenticity.
What Is How to Identify Gemstones From a Photo?
How to identify gemstones from a photo means using visible features in an image to estimate a stone’s likely identity. The photo-based lookup compares color, luster, transparency, crystal habit, banding, grain size, inclusions, and surface texture against known gem and mineral patterns.
This workflow is strongest for common materials such as quartz varieties, feldspar, garnet, jasper, agate, calcite, fluorite, and many opaque decorative stones. It is weaker for simulants, treated stones, synthetics, and polished pieces where diagnostic fracture, cleavage, or crystal faces have been removed. For reference terminology, the [USGS minerals overview](https://www.usgs.gov/special-topics/water-science-school/science/minerals) is a useful baseline.
How to Identify Gemstones From a Photo Works
Gemstone photo identification works by turning image features into a ranked shortlist of likely materials. The scanner reads visible cues such as hue, saturation, translucency, vitreous or waxy luster, cleavage planes, conchoidal fracture, crystal outline, matrix, banding, and inclusion patterns, then compares them with learned examples of minerals and gem materials.
The result is a probability-based match, not a lab conclusion. A second image from a different angle can change the ranking because glare, polish, and lighting alter what the camera captures. Photos are processed for ID in a privacy-friendly way rather than being treated as public posts. For best results, use the iOS app link when you need quick field checks from a phone.
How to Use a Gemstone Photo Identifier
Clean the stone
Wipe dust, fingerprints, wax, or oil from the surface before photographing. Small films can make quartz look greasy, hide cleavage in calcite, or mute the color zoning that helps separate natural agate from dyed material.
Photograph in diffuse light
Use shaded daylight or soft window light, not direct flash. Take one top-down image and one side-angle image so the tool can see luster, transparency, crystal habit, and surface texture.
Add scale and contrast
Place the specimen on a neutral gray background with a coin or ruler nearby. Scale helps distinguish tiny druzy crystals, large cleavage fragments, cabochons, and tumbled stones.
Upload the clearest image
Choose the sharpest photo where the gemstone fills most of the frame. If the stone is translucent, add a backlit image to show internal zoning, bubbles, veils, or inclusions.
Verify the shortlist
Compare the top matches with Mohs hardness, streak, cleavage or fracture, heft, and typical luster. If a proposed identification fails a simple hardness check, treat the photo match as tentative.
When to Use Gemstone Photo Identification (and When Not To)
Use it when
- Use it when sorting mixed tumbled stones, beach finds, estate-sale specimens, or field samples into a likely shortlist.
- Use it when the gemstone has distinctive visual features such as banding, chatoyancy, druzy texture, crystal faces, matrix, or strong color zoning.
- Use it before physical testing to decide which checks matter most, such as hardness for quartz versus calcite or streak for opaque minerals.
- Use it for educational comparison when learning luster terms, cleavage patterns, fracture types, and common gem look-alikes.
Skip it when
- Do not rely on photo ID alone for high-value stones, insurance decisions, sales listings, or inheritance appraisals.
- Do not use it as final proof of natural versus synthetic origin, because many lab-grown and natural stones look similar in photos.
- Do not trust it blindly for mounted jewelry where the setting hides the pavilion, girdle, inclusions, and heft.
- Do not use it as the only test for dyed, stabilized, heat-treated, or impregnated stones such as turquoise, agate, jade, or corundum.
Gemstone Photo Identification vs Google Lens and Stone Identifier App
| Feature | Rock Identifier | Google Lens | Stone Identifier App |
|---|---|---|---|
| Best fit | Gem, mineral, crystal, and rock photo ID with geology-focused result pages | General visual search across the web, products, images, and shopping listings | Consumer gemstone and crystal scanning with simplified matching |
| Geology terms | Uses mineral cues such as luster, cleavage, streak, habit, transparency, and fracture | May surface similar-looking web images without explaining mineral diagnostics | Usually gives basic names and short descriptions, with variable test guidance |
| Verification support | Encourages checking hardness, specific gravity, streak, and cleavage after the photo result | Useful for visual comparison, but not built around confirmatory mineral tests | May include educational notes, but often less structured for field verification |
| Look-alike handling | Better suited for comparing quartz, calcite, feldspar, jasper, agate, glass, and common crystals | Can confuse jewelry, décor, glass, resin, and minerals if web images look similar | Can be helpful for popular crystals but may oversimplify treated or polished pieces |
| Cost and access | Free photo ID option for quick checks | Free general search tool | Typically app-based, with features depending on subscription model |
For gemstones, a dedicated mineral scanner is usually better than a general image search because it frames the result around diagnostic properties. Google Lens is still useful for comparing visual matches, labels, and product pages.
Gemstone Photo Identification Use Cases
- Sorting tumbled stones: Photo ID is useful for separating common polished stones into likely groups such as quartz, jasper, agate, aventurine, sodalite, hematite, and calcite. Because tumbling removes crystal faces and fracture clues, follow up with hardness and streak when the color pattern is not distinctive.
- Checking field finds: A quick image can help decide whether a specimen is worth carrying home or testing further. Matrix, weathering rind, crystal habit, and fresh broken surfaces are especially useful in field photos.
- Screening jewelry stones: A photo can suggest broad possibilities, such as glass, quartz, garnet, spinel, corundum, or synthetic material. It cannot confirm authenticity, treatment, or value when the stone is mounted or faceted.
- Learning mineral diagnostics: Using photo results beside physical checks helps train the eye. Repeated comparisons make it easier to recognize vitreous luster, waxy luster, cleavage steps, conchoidal fracture, color zoning, and dye concentration along cracks.
Gemstone Photo Identification Limitations
- Treated stones are difficult from photos alone. Dyeing, heat treatment, stabilization, resin impregnation, and surface coatings can imitate natural color and luster.
- Polished and tumbled specimens are harder to identify because rounding and polish remove cleavage, fracture texture, crystal faces, and weathered surfaces.
- Rare minerals may be misidentified as common look-alikes if the image resembles quartz, calcite, feldspar, fluorite, glass, or jasper.
- Photo quality strongly affects results. Blur, flash hotspots, warm indoor lighting, shadows, and overexposure can shift color and hide luster.
- Value estimates should not be made from photo ID. Price depends on identity, size, treatment, origin, clarity, cut, demand, and documentation.
- Natural versus synthetic origin usually requires gemological testing, such as refractive index, birefringence, spectroscopy, microscopy, or fluorescence response.
- Mounted jewelry limits identification because prongs and bezels hide the stone’s pavilion, inclusions, girdle, and true weight.
- Look-alike pairs such as quartz versus glass, turquoise versus dyed howlite, jadeite versus serpentine, and ruby versus spinel often require physical tests.
Common mistakes
- Using flash or direct sunlight, which can create glare that hides luster, cleavage, inclusions, and color zoning
- Assuming the top photo match is final without checking hardness, streak, fracture, or specific gravity
- Photographing only one angle of a gemstone when side views, backlighting, or close-ups may reveal diagnostic features
- Trying to identify mounted jewelry from a photo even though the setting may hide the pavilion, girdle, inclusions, and heft
- Confusing color with identity, even though many gemstones share similar colors and require additional tests
- Ignoring scale, which can make druzy crystals, chips, cabochons, and larger specimens harder to compare accurately
- Expecting a photo to detect dye, resin, glass filling, heat treatment, or synthetic origin with certainty
Use a Gemstone Photo Identifier as a First Step
A gemstone photo identifier can quickly narrow a specimen to a practical shortlist when the image is clear and well lit. Confirm important results with physical mineral tests or a qualified gemologist before relying on the identification for value, sale, or authenticity.
Related Articles

Frequently Asked Questions
Can a photo identify a gemstone?
A photo can usually provide a useful shortlist for common gemstones and minerals. It should not be treated as final proof, especially for valuable, treated, synthetic, or mounted stones.
What photo works best?
Use diffuse daylight, a neutral background, sharp focus, and a scale reference such as a coin or ruler. Take at least two angles, including a side view that shows luster and transparency.
Can it spot fake gemstones?
Sometimes a photo can flag obvious clues, such as bubbles in glass or dye concentration along cracks. Many fakes and simulants look convincing, so confirmation needs tests like hardness, specific gravity, refractive index, or microscope inspection.
Why do results change by angle?
Different angles change glare, color saturation, transparency, and visible inclusions. A glossy cabochon may hide texture in one image and reveal banding or fracture in another.
How accurate is photo identification?
Accuracy is best for common stones with distinctive color, banding, crystal habit, or surface texture. It drops for polished stones, poor lighting, close look-alikes, and materials altered by dye, heat, resin, or stabilization.
What tests should I do next?
Start with Mohs hardness, streak on unglazed porcelain for opaque minerals, and a close look at cleavage versus fracture. If possible, estimate specific gravity because heft separates many stones that look similar in photos.
Can it identify mounted jewelry?
It can suggest possibilities, but mounted stones are harder because the setting hides important features. For expensive jewelry, use a jeweler or gemologist who can test refractive index, magnification, fluorescence, and weight.
Can it tell gemstone value?
No photo-only result can reliably determine value. Appraisal depends on verified identity, treatment status, size, clarity, cut quality, origin, market demand, and documentation.
Is glass mistaken for quartz?
Yes, glass and quartz are common photo look-alikes because both can appear clear, colored, and vitreous. Bubbles, molded surfaces, conchoidal fracture, hardness, and specific gravity help separate them.