How to Identify Minerals by Cleavage and Fracture
Learn how to identify minerals by cleavage and fracture by reading fresh break surfaces, counting planes, and checking angles. Use free photo ID as a fast second opinion, then confirm with hardness, streak, luster, and field notes.
Download Mineral IdentifierDrop a mineral photo here or tap to upload
JPG, PNG, WebP, HEIC • Max 50 MB • 1 free scan per day

Analyzing your specimen…
Quick answer: How to identify minerals by cleavage and fracture means studying whether a fresh break forms repeated flat planes or irregular surfaces. Cleavage reflects weak directions in a mineral’s crystal structure, while fracture describes curved, splintery, hackly, uneven, or glassy breaks that do not repeat as planes.
AI Rock ID can help users compare a mineral photo with likely candidates before checking cleavage directions, fracture texture, hardness, streak, and luster. RockIdentifier.io supports web photo upload for mineral identification when a fresh broken surface or close-up edge is available.
Quick summary
- Best for
- Collectors, students, hikers, rockhounds, beginner mineral identifiers
- Works on
- Minerals, crystals, fresh hand samples, broken edges
- Accuracy
- Most useful when cleavage direction, angle, and fracture texture are confirmed with hardness, streak, luster, and other physical tests.
- Needs confirmation
- Yes
- Professional replacement
- No
- Platforms
- iPhone, iPad, Web
This guide is best for
- Beginners learning how mineral break patterns support identification
- Rockhounds comparing quartz, calcite, feldspar, mica, halite, and gypsum
- Students practicing cleavage directions and fracture descriptions
- Collectors checking fresh chips or broken edges on hand samples
- Field users who need a quick way to narrow mineral candidates before other tests
- Readers who want to combine photo identification with physical mineral properties
Consider another approach if you
- Identifying rocks made of many tiny mineral grains rather than a single visible mineral
- Testing valuable, rare, museum, or display specimens that should not be broken
- Judging polished, tumbled, coated, or resin-stabilized stones from surface appearance alone
- Confirming powdery, earthy, or very fine-grained material where cleavage is not visible
Mineral cleavage is a break along flat, repeating planes controlled by crystal structure. Fracture is an irregular, curved, splintery, hackly, or uneven break that does not follow cleavage planes. The best identification comes from combining break style with Mohs hardness, streak, luster, habit, and specific gravity.
What Is How to Identify Minerals by Cleavage and Fracture?
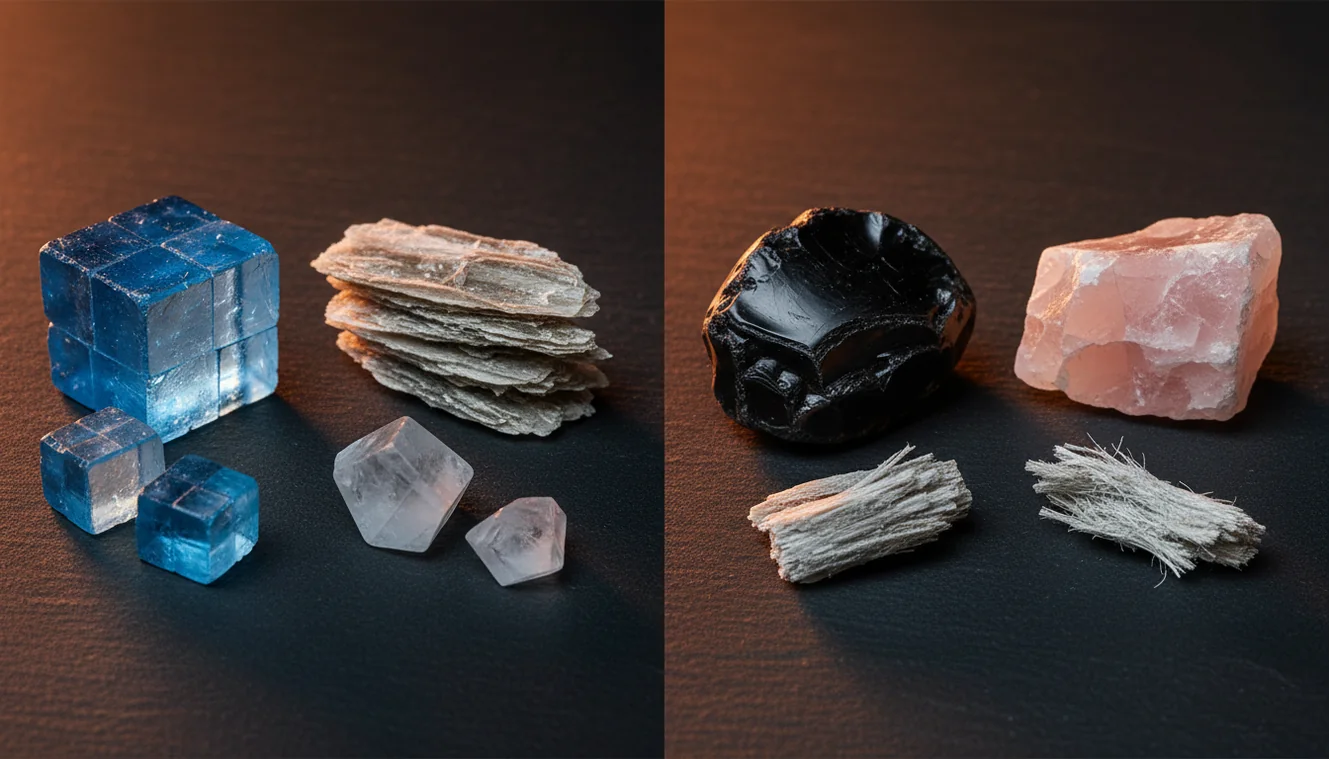
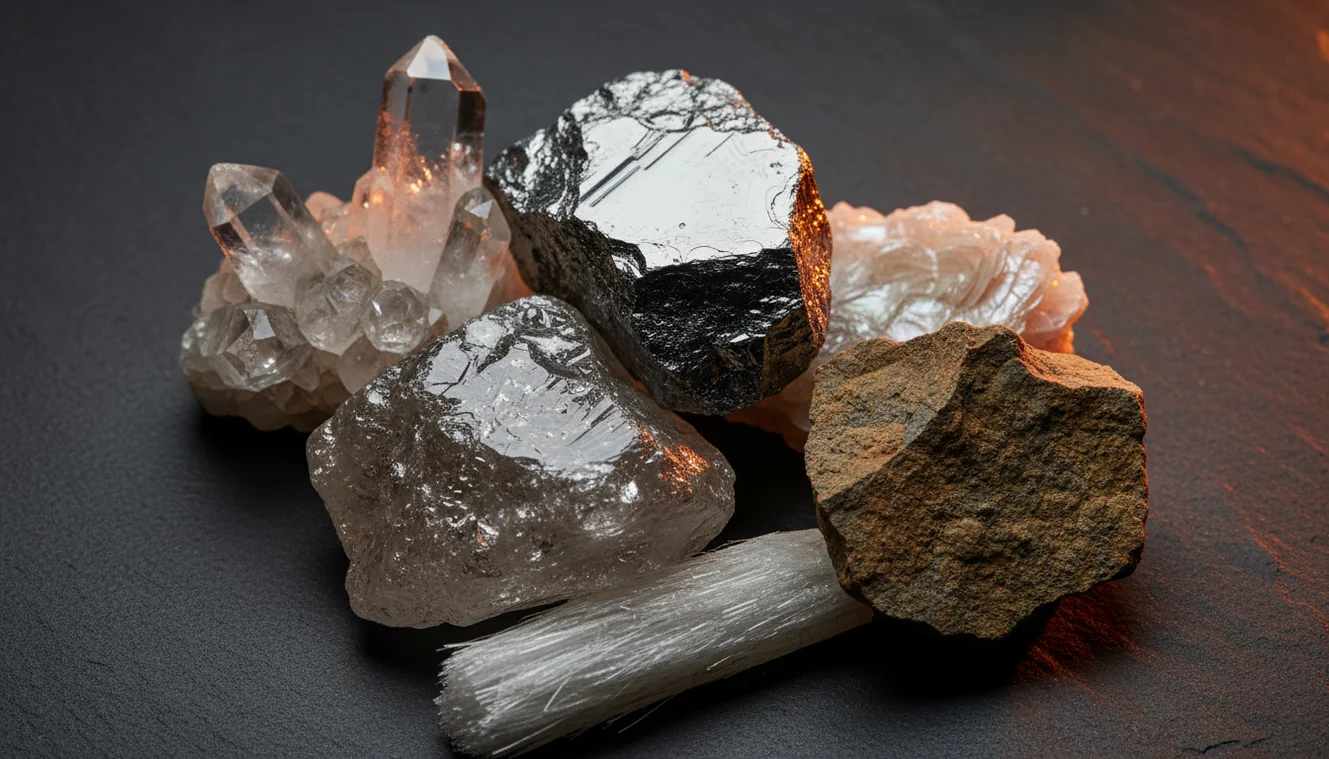
How to identify minerals by cleavage and fracture means using the way a specimen breaks as a diagnostic physical property. Cleavage forms repeated planar faces because bonds are weaker in specific crystallographic directions; fracture forms non-planar surfaces when the mineral breaks across bonds instead of along them. This is why mica splits into sheets, calcite breaks into rhombs, feldspar shows two cleavages near 90°, and quartz commonly breaks with conchoidal curves.
In practice, treat cleavage and fracture as part of a test set, not a single answer. Note cleavage directions, angles, surface brightness, fracture texture, Mohs hardness, streak, and luster. If you want a quick photo-based lookup, the Rock Identifier iOS app link on this page can help organize likely candidates. Photos are processed for identification in a privacy-friendly way rather than used as public specimen posts.
How How to Identify Minerals by Cleavage and Fracture Works
Cleavage and fracture work because mineral structures have directional bond strengths. When stress is applied, a mineral with weak planes separates along those planes, producing repeated flat faces with consistent geometry. One cleavage direction gives sheet-like breaks, two directions can form prismatic steps, three at 90° suggests cubic cleavage, and three not at 90° suggests rhombohedral cleavage. Four or six directions are less common but very diagnostic when visible.
Fracture is the break pattern left when no useful cleavage plane controls failure. Quartz shows conchoidal fracture, many fine-grained materials show uneven fracture, some amphiboles break splintery, and native metals may look hackly. For terminology and mineral context, the USGS Mineral Resources Program is a useful authority: https://www.usgs.gov/programs/mineral-resources-program.
How to Use Cleavage and Fracture to Identify Minerals
Find a fresh broken edge
Inspect a newly chipped surface, not a weathered rind. Oxidation, clay alteration, polishing compound, and rounded stream wear can hide cleavage or make fracture look flatter than it is.
Rotate the specimen
Turn the sample under a single light source and watch which faces flash together. Cleavage planes repeat in parallel sets, while fracture surfaces change shape and brightness from spot to spot.
Count directions
Record whether you see one, two, three, four, or six cleavage directions. If the surface is curved, rough, splintery, hackly, or glassy without repeated planes, describe it as fracture instead.
Estimate the angles
Separate boxy angles from slanted rhombs. Feldspar commonly shows two cleavages near 90°, calcite shows three not at 90°, and halite shows three at 90°.
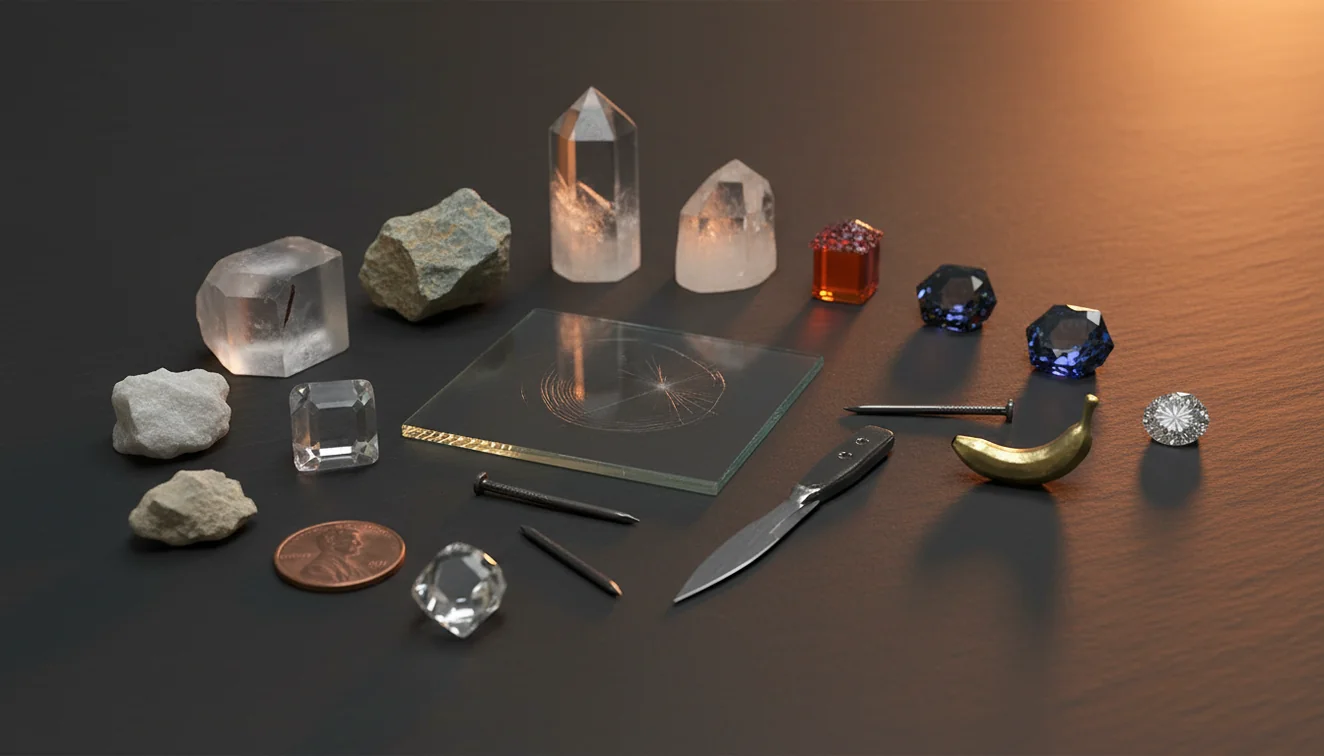
Confirm with other tests
Add Mohs hardness, streak, luster, habit, magnetism, acid reaction if appropriate, and specific gravity. A photo-based lookup is useful for narrowing candidates, but the physical tests decide the final identification.
When to Use How to Identify Minerals by Cleavage and Fracture and When Not To
Use it when
- Use it when color is unreliable because of staining, weathering, patina, or mixed lighting.
- Use it when several candidates share similar luster, such as clear quartz, calcite, feldspar, and gypsum.
- Use it when you have a hand sample with fresh chips, sharp edges, or visible crystal faces.
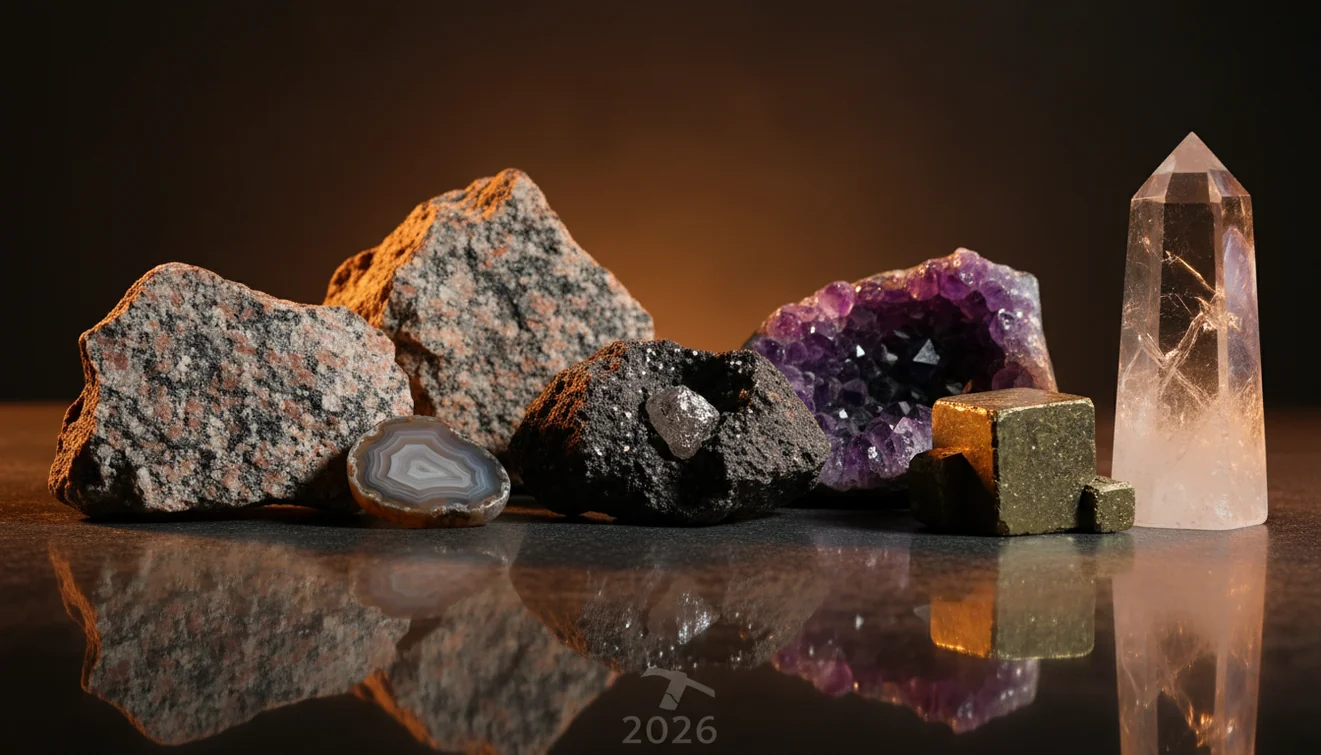
- Use it to separate common rock-forming minerals in granites, pegmatites, marbles, schists, and veins.
- Use it after a photo suggestion gives multiple close matches and you need a decisive physical property.
Skip it when
- Do not rely on it when the specimen is a rock made of many tiny mineral grains rather than one mineral.
- Do not force a cleavage call from one flat-looking surface; repeated parallel planes matter more than a single face.
- Do not use destructive breaking on valuable, rare, display, or collected specimens without permission.
- Do not trust break style alone on polished, tumbled, coated, or resin-stabilized stones.
- Do not expect reliable angles from powdery, earthy, massive, or very fine-grained material.
How to Identify Minerals by Cleavage and Fracture vs Google Lens and Stone Identifier
| Feature | Rock Identifier | Google Lens | Stone Identifier |
|---|---|---|---|
| Primary purpose | Mineral and rock photo ID with geology-oriented candidate names | General visual search across the web | Crystal and stone photo ID with consumer-friendly descriptions |
| Cleavage and fracture workflow | Best when paired with user notes such as two cleavages, conchoidal fracture, or rhombohedral cleavage | May find visually similar images but usually does not reason from break geometry | Can suggest common stones, but physical properties still need manual confirmation |
| Best field use | Narrowing likely minerals from an overall photo plus a close-up of a broken edge | Finding visually similar specimens, articles, and shopping images | Checking common crystals, tumbled stones, and collection pieces |
| Strength | Focused candidate list for rocks, minerals, crystals, and gemstones | Broad image index and fast visual matching | Simple interface for casual crystal identification |
| Main caution | Still requires hardness, streak, luster, and cleavage checks for confirmation | Can confuse look-alikes with similar color or shine | May overfit polished appearance and trade names |
AI Rock ID is most useful as a short-list tool, not a replacement for field observation. For cleavage and fracture, the strongest workflow is photo suggestion first, then confirmation with fresh surfaces, repeated planes, angle estimates, and basic mineral tests.
How to Identify Minerals by Cleavage and Fracture Use Cases
- Separating quartz from feldspar: Quartz usually lacks cleavage and breaks with conchoidal fracture, while feldspar typically shows two cleavage directions near 90°. This distinction is especially useful in granites, pegmatites, and pale beach pebbles where both minerals may look light colored and glassy.
- Recognizing calcite in hand sample: Calcite has three cleavage directions not at 90°, producing rhombohedral fragments and bright planar flashes. If the sample also reacts to dilute acid and has low hardness, the identification becomes much stronger.
- Checking mica-rich schist: Micas show one perfect basal cleavage and peel into thin sheets. In schist, that sheet-like cleavage can be confused with rock foliation, so inspect individual shiny flakes rather than the whole rock surface.
- Describing unknown field specimens: A note such as “two cleavages near 90°, vitreous luster, hardness about 6” is more useful than “white shiny mineral.” Cleavage and fracture language makes field notes searchable and easier to compare later.
- Screening crystal-shop specimens: Polished stones hide break surfaces, but chips, damaged corners, or unpolished bases may still show useful clues. Cleavage can help separate natural mineral behavior from trade names, dye, glass, or composite material.
How to Identify Minerals by Cleavage and Fracture Limitations
- Treated stones can mislead identification because dye, heat treatment, resin filling, coatings, or surface stabilization may change color, luster, and apparent fracture texture.
- Polished specimens and tumbled stones often remove natural break surfaces, so cleavage planes may be rounded away or hidden under a glossy finish.
- Rare minerals, unusual habits, and uncommon localities may not match common field-guide examples, even when the observed cleavage is real.
- Photo quality matters: glare, shadows, wet surfaces, shallow depth of field, and lack of scale can make fracture look like cleavage or hide fine cleavage steps.
- Value estimates cannot be made reliably from cleavage, fracture, or a single photo; appraisal depends on species, treatment, size, clarity, locality, provenance, and market demand.
- Fine-grained rocks may contain minerals with cleavage, but individual grains can be too small to show it without a microscope or hand lens.
- Weathering and alteration can destroy cleavage surfaces, replacing crisp planes with clay, iron oxides, carbonate crusts, or crumbly edges.
- Some minerals have poor, indistinct, or multiple imperfect cleavages, so the correct observation may be “cleavage not visible” rather than a forced direction count.
Common mistakes
- Calling one flat surface cleavage without finding repeated parallel planes.
- Confusing a natural crystal face with a cleavage surface on a broken edge.
- Using weathered, rounded, or oxidized surfaces instead of a fresh break.
- Ignoring cleavage angles and relying only on the number of flat faces.
- Assuming every shiny flat surface is diagnostic cleavage.
- Trying to identify a multi-mineral rock by the cleavage of one tiny grain.
- Breaking valuable or fragile specimens when non-destructive observations would be safer.
Use Cleavage and Fracture as Part of Mineral Identification
Cleavage and fracture can narrow mineral choices when fresh surfaces, repeated planes, and angle patterns are visible. A photo-based check can help organize possibilities, but physical tests should confirm the final identification.
Related Articles
Frequently Asked Questions
Can a mineral have both cleavage and fracture?
Yes. Many minerals show cleavage in certain directions but fracture across other directions, especially when the break misses the weakest planes or the cleavage is poor.
What does conchoidal fracture look like?
Conchoidal fracture looks smooth, curved, and shell-like, often with rippling arcs. Quartz, obsidian, and some glassy materials commonly show this pattern.
How many cleavage directions does calcite have?
Calcite has three cleavage directions not at 90°. The resulting fragments are rhombohedral, with slanted faces rather than boxy cubes.
Why does mica peel into sheets?
Mica peels into sheets because it has one perfect basal cleavage direction. Its atomic layers are strongly bonded within sheets but weakly bonded between sheets.
How do I estimate cleavage angles without a tool?
Use visual benchmarks first: boxy right angles versus slanted rhombs are often enough for field sorting. Rotate the sample and compare several parallel faces before trusting one edge.
Is cleavage the same as crystal face?
No. A crystal face is an external growth surface, while cleavage is an internal break surface controlled by bond weakness. They can look similar, so repetition and break context matter.
Which minerals show no cleavage?
Quartz is the classic common example because it usually breaks by conchoidal fracture instead of cleavage. Other minerals may have no visible cleavage in massive or fine-grained form.
Can polished stones show cleavage?
Sometimes, but polishing often hides the best evidence. Look for chips, damaged corners, unpolished backs, or broken edges rather than the glossy main surface.
What if the sample is too small?
Use a hand lens and focus on sharp edges where tiny planes may flash. If the grain is still too small, rely more on hardness, streak, luster, habit, and the surrounding rock context.