How to Use the Mohs Hardness Scale in the Field
Pair a simple scratch kit with photo-based lookup to narrow mineral candidates before you mark a specimen. The field goal is not a perfect number; it is a defensible hardness bracket.
Get Mohs Hardness AppDrop a rock photo here or tap to upload
JPG, PNG, WebP, HEIC • Max 50 MB • 1 free scan per day

Analyzing your specimen…
Quick answer: How to use the Mohs hardness scale in the field means testing a fresh mineral surface with known scratch references and recording the result as a hardness range. A reliable field check confirms that a mark is a true groove, not transferred residue, and combines hardness with streak, luster, cleavage, fracture, habit, and locality.
AI Rock ID can help users compare a specimen photo with likely mineral groups before applying the Mohs hardness scale in the field. RockIdentifier.io supports web photo upload for a preliminary visual check that should be confirmed with scratch behavior and other mineral properties.
Quick summary
- Best for
- Collectors, hikers, students, field geology beginners, rockhounds
- Works on
- Minerals, crystals, fresh rock surfaces, hand samples
- Accuracy
- Useful for narrowing mineral candidates, but not sufficient for a complete identification by itself
- Needs confirmation
- Yes
- Professional replacement
- No
- Platforms
- iPhone, iPad, Web
This guide is best for
- Beginners learning how to separate common minerals by scratch resistance
- Rockhounds who need a quick field bracket before taking a specimen home
- Collectors checking common hand samples without damaging display faces
- Students practicing mineral identification with simple reference tools
- Hikers or beachcombers comparing pebbles, crystals, and weathered fragments
- Field note takers who want to combine photo evidence with physical tests
Consider another approach if you
- Owners of valuable gems, museum specimens, or sale-quality crystals that should not be scratched
- People identifying fine-grained rocks where several minerals are mixed together
- Anyone needing a laboratory-grade hardness measurement
- Users who want hardness alone to provide a final mineral name
- Specimens with coatings, weathering rinds, or polished surfaces that hide the fresh material
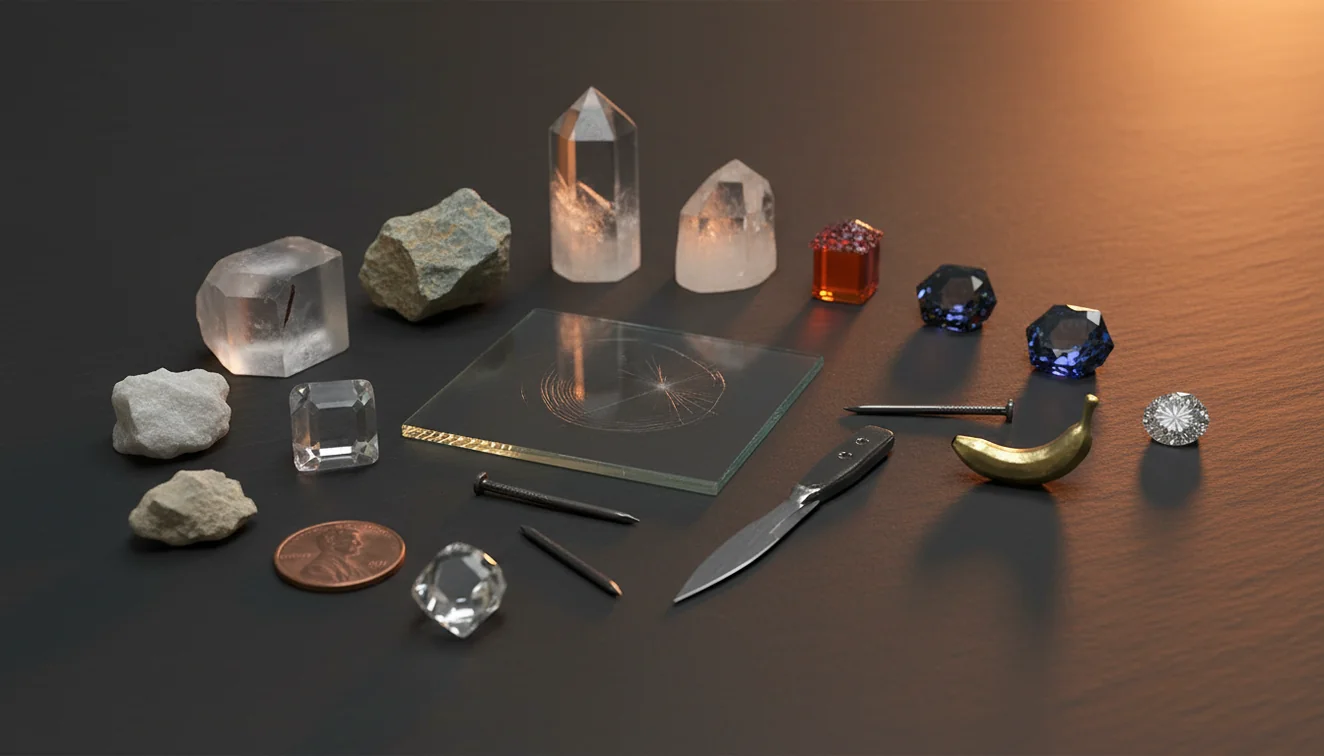
How to use the Mohs hardness scale in the field: test a fresh surface with known references, verify that each mark is a true groove, and record the result as a range. A fingernail is about Mohs 2.5, copper is near 3, glass is about 5.5, and quartz is 7. Hardness works best when combined with streak, luster, cleavage, fracture, crystal habit, and locality.
What Is How to Use the Mohs Hardness Scale in the Field?
Using the Mohs hardness scale in the field means estimating a mineral’s scratch resistance with portable reference materials instead of laboratory equipment. The scale is relative, running from talc at 1 to diamond at 10, so the practical result is usually a bracket such as “scratches calcite but not fluorite.” Mindat’s Mohs scale reference (https://www.mindat.org/a/mohs_scale) is a useful authority for standard mineral hardness values.
In practice, you photograph the specimen, choose an unweathered surface, and test with progressively harder tools. If you want a photo-first check before scratching, Rock Identifier can suggest likely mineral groups; use the iOS app link on the page when working from an iPhone. Photos are processed for identification so you can keep field notes privacy-friendly.
How to Use the Mohs Hardness Scale in the Field Works
The Mohs field test works by comparing two materials: the harder one makes a permanent groove in the softer one. A transferred streak of metal, glass powder, or mineral dust is not a valid scratch, so the line must be wiped and checked under angled light or a hand lens.
Start below the expected hardness and move upward until a reference tool scratches the specimen, then test whether the specimen scratches a known reference such as glass. This two-way bracketing reduces false positives from weathered rinds, mixed grains, or cleavage flaking. The mechanism is simple, but interpretation depends on texture: a quartz grain in a soft matrix can scratch glass even when the whole rock is not hardness 7.
How to Use the Mohs Hardness Scale in the Field
1. Photograph the specimen first
Capture the fresh surface, overall habit, matrix, and any cleavage faces before scratching. This preserves visual evidence and helps you compare hardness with luster, color zoning, crystal form, and weathering.
2. Choose a fresh test spot
Avoid dusty rinds, iron staining, clay coatings, and polished display faces. A small broken edge or inconspicuous corner usually gives a more honest reading than an altered exterior.
3. Test with a softer reference
Begin with a fingernail, copper coin, or similar low-hardness tool. Use light, controlled pressure so you do not crush grains or split the specimen along cleavage.
4. Wipe and inspect the mark
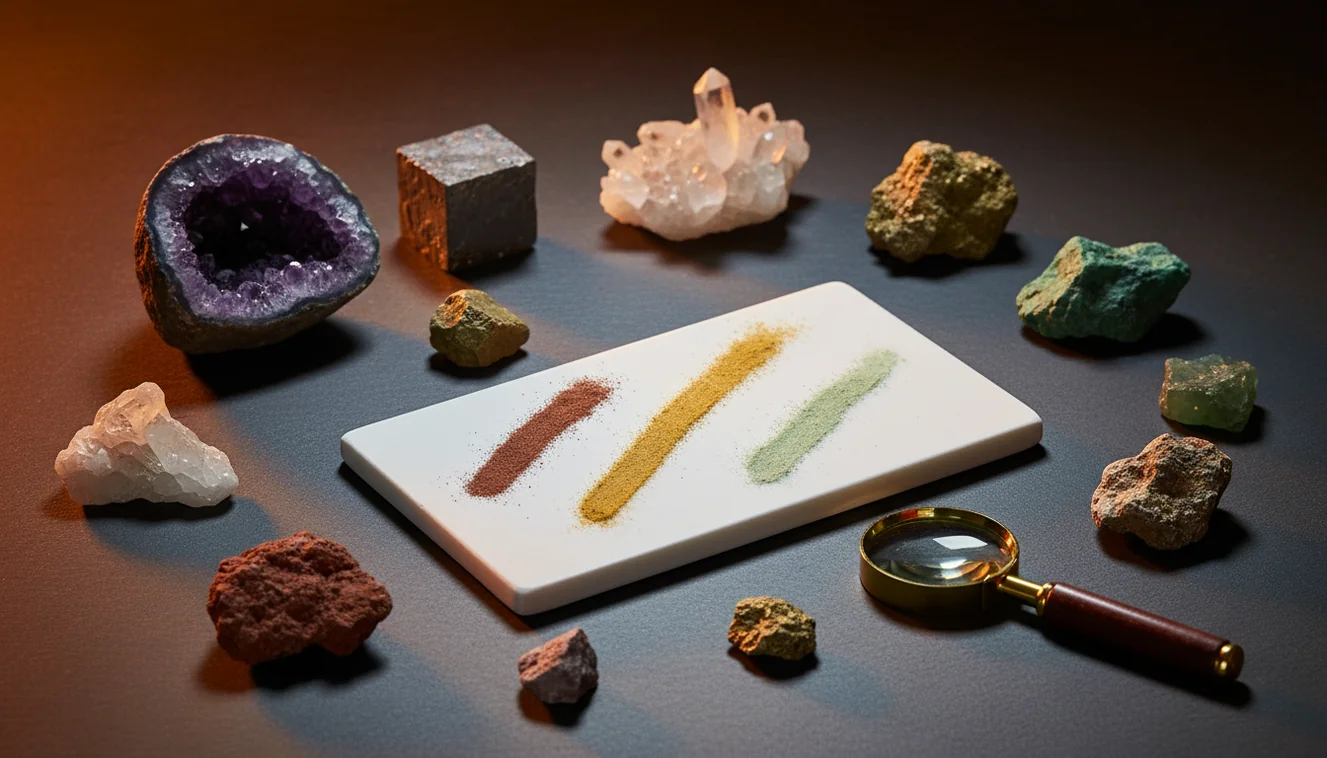
Remove residue with a cloth or brush, then tilt the surface into raking light. A true scratch is a groove; a colored streak sitting on top of the surface is only transferred material.
5. Bracket with harder references
Move to steel, glass, or known mineral points until you find the boundary. Record the result as a range, then confirm it against streak, cleavage, fracture, specific gravity by heft, and geologic context.
When to Use the Mohs Hardness Scale in the Field (and When Not To)
Use it when
- Use it when color is unreliable because of staining, oxidation, weathering, or lighting.
- Use it to separate common lookalikes, such as calcite at Mohs 3 from quartz at Mohs 7.
- Use it when luster and habit suggest several candidates with different hardness ranges.
- Use it on a small, inconspicuous area when a specimen is common and not fragile.
- Use it after photos and visual notes, so mechanical testing does not erase useful surface evidence.
Skip it when
- Do not use it on valuable gem crystals, museum-quality faces, or specimens you intend to sell.
- Do not rely on it alone for fine-grained rocks, breccias, or aggregates with multiple mineral phases.
- Do not test weathered coatings and assume they represent the unaltered interior.
- Do not press hard enough to cause cleavage flaking, crumbling, or conchoidal chips.
- Do not treat a single scratch result as a full identification without checking streak, cleavage, fracture, and locality.
How to Use the Mohs Hardness Scale in the Field vs Google Lens and Stone Identifier
| Feature | Rock Identifier | Google Lens | Stone Identifier |
|---|---|---|---|
| Best field role | Photo-based mineral shortlist that can be checked with hardness, streak, and cleavage. | General visual search for similar-looking images, labels, and web pages. | Photo-based stone or crystal suggestions with consumer-friendly names. |
| Hardness workflow | Pairs visual suggestions with manual Mohs bracketing and geology observations. | Does not guide scratch testing or distinguish true grooves from residue. | Can suggest candidates, but field-property confirmation is still needed. |
| Geology context | Useful when you include matrix, habit, fresh surface, and close-up texture. | Often favors image similarity over mineral properties or locality. | Helpful for common crystals, but mixed rocks and altered surfaces remain difficult. |
| Best limitation to remember | The scan is a shortlist, not a lab result; hardness still needs careful verification. | Image matches can be visually plausible but mineralogically wrong. | Polished or dyed stones may be suggested confidently even when diagnostic texture is missing. |
A field scratch test and an image search answer different questions. Use visual tools to narrow candidates, then use Mohs hardness to reject minerals that do not fit the specimen’s physical behavior.
Mohs Hardness Scale Field Test Use Cases
- Separating carbonate from quartz-rich material: Calcite scratches easily with a steel point and reacts with acid, while quartz resists steel and scratches glass. Hardness quickly prevents color-based misidentification.
- Checking weathered stream pebbles: Rounded pebbles often lose obvious crystal habit. A scratch bracket, plus fracture and luster, helps separate jasper, chert, feldspar, and softer altered rock.
- Testing crystals in matrix: A specimen can contain soft matrix and hard crystals. Testing individual grains avoids assigning one hardness value to a mixed rock.
- Confirming field notes after photo ID: When a scanner suggests several lookalikes, hardness can eliminate candidates outside the observed range. This is especially useful for common silicates, carbonates, and sulfates.
- Teaching diagnostic mineral properties: Students learn quickly when they see that hardness is independent of color. Gypsum, calcite, fluorite, apatite, feldspar, and quartz make a clear training sequence.
How to Use the Mohs Hardness Scale in the Field Limitations
- Treated stones, dyed material, coatings, sealants, and stabilized specimens can hide the natural surface and give misleading scratch behavior.
- Polished specimens are harder to test because a visible scratch may damage the finish, and curved surfaces make shallow grooves difficult to confirm.
- Rare minerals and unusual solid-solution varieties may fall outside simple field expectations, so a Mohs bracket should not be treated as a definitive name.
- Photo quality still matters for any photo-based lookup; blurred, wet, shadowed, or single-angle images reduce the reliability of the candidate list.
- Value estimates cannot be made from hardness alone, because price depends on species, size, clarity, treatment, provenance, cut, demand, and damage.
- Mixed rocks, fine-grained aggregates, and weathered rinds may show different hardness values from one spot to another.
- Cleavage and brittleness can mimic scratching when grains flake, crumble, or split along weak planes under too much pressure.
Common mistakes
- Treating a metal streak left on the specimen as a scratch instead of wiping the mark and checking for a groove
- Testing a weathered rind and assuming the result represents the fresh mineral inside
- Pressing too hard and causing cleavage flakes or crushed grains instead of a clean scratch
- Reporting one exact Mohs number when the field result only supports a hardness bracket
- Using window glass, steel, or coins without knowing their approximate hardness range
- Ignoring mixed-grain rocks where one hard mineral can scratch even though the whole rock is softer
- Trying hardness first on a valuable crystal face instead of photographing and choosing an inconspicuous spot
Use the Mohs hardness scale in the field with photo-supported notes
A photo taken before scratching preserves visual evidence that may be lost during testing. Use the hardness result as one field clue, then compare it with streak, luster, cleavage, fracture, habit, and locality.
Related Articles
Frequently Asked Questions
What hardness can a fingernail scratch?
A fingernail is about Mohs 2.5. It can scratch gypsum at Mohs 2, but it should not scratch calcite at Mohs 3 if the surface is fresh and the mark is a true groove.
Is a pocketknife reliable for hardness?
A pocketknife or steel blade is commonly around Mohs 5 to 5.5, but alloys vary. Use it as a bracket tool, then confirm with glass or a known mineral reference if possible.
Why did glass leave a mark?
Glass can leave powder or a gray residue that looks like a scratch. Wipe the line and inspect it under angled light; if there is no groove, the test did not prove the specimen is softer.
Can quartz scratch window glass?
Yes, quartz at Mohs 7 should scratch common window glass, which is usually about Mohs 5.5. Test a small edge and verify that the glass has a groove rather than loose mineral dust on the surface.
Should I test streak or hardness first?
Photograph first, then do the least damaging diagnostic tests. Streak is often less destructive than repeated hardness testing, but the best order depends on whether the specimen is fragile, valuable, or already broken.
Can cleavage affect scratch tests?
Yes, minerals with strong cleavage can flake or split when pressed, which can imitate a scratch. Use light pressure on a stable fresh surface and repeat the test on another spot if the result looks suspicious.
What if different spots test differently?
Different results usually mean the specimen is mixed, weathered, coated, or grainy. Record each tested spot separately and describe whether you tested a crystal, matrix, vein, rind, or fresh interior.
Can hardness identify a mineral alone?
No, hardness narrows the candidate list but rarely identifies a mineral by itself. Combine the bracket with streak, luster, cleavage, fracture, crystal habit, density by heft, and locality.
Will hardness tell gem value?
Hardness can indicate durability, but it does not determine gem value. Value also depends on species, treatment, color, clarity, cut, size, origin, demand, and whether the specimen has damage.