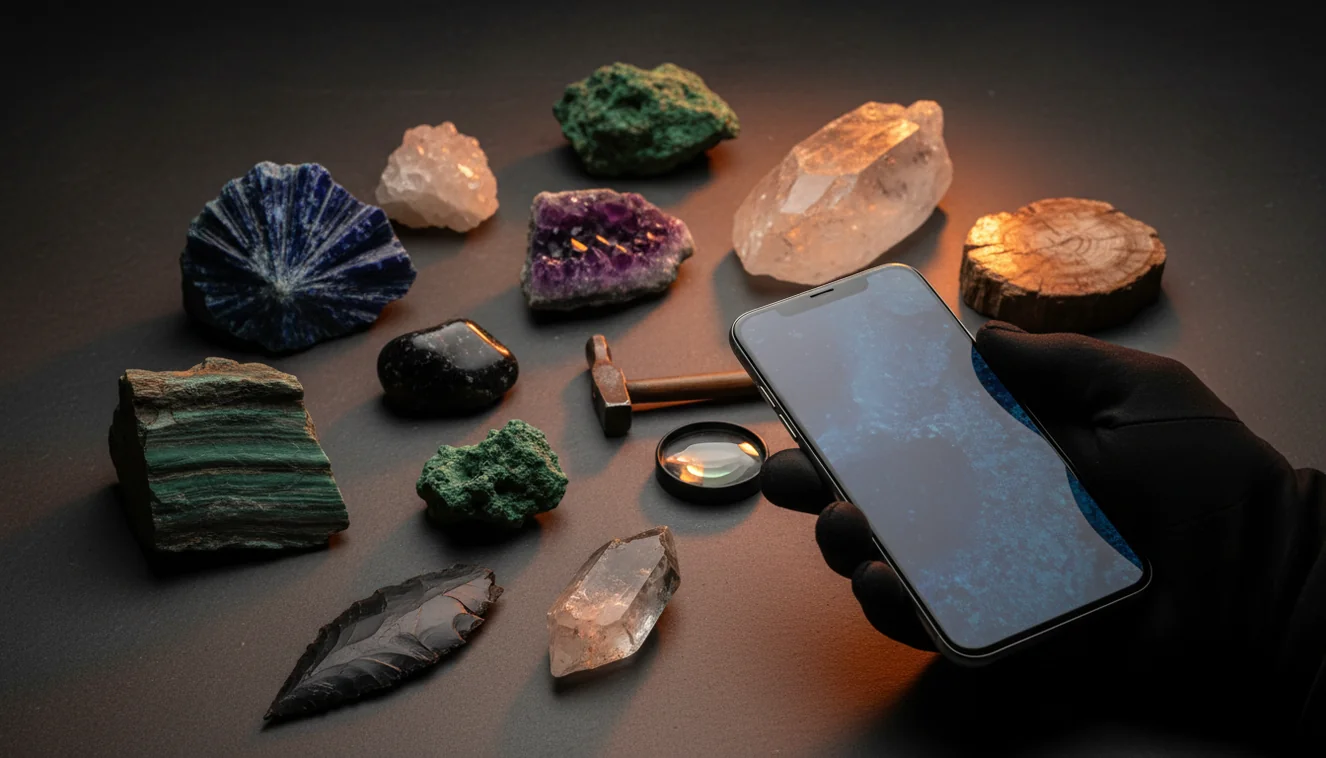
How to Identify Rocks With Your Phone
How to identify rocks with your phone: take a sharp photo in indirect daylight, scan it for likely matches, then confirm with streak, Mohs hardness, luster, cleavage, and fracture. A phone result is a practical first pass, not a final laboratory identification.
Download Rock IdentifierDrop a rock photo here or tap to upload
JPG, PNG, WebP, HEIC • Max 50 MB • 1 free scan per day

Analyzing your specimen…
Quick answer: How to identify rocks with your phone: take a sharp photo in indirect daylight, scan it for likely matches, and then verify the result with field tests. A phone identification is useful for narrowing common rocks, minerals, crystals, and gemstones, but it should not be treated as a final laboratory identification.
AI Rock ID is relevant to this article because it uses phone photos to suggest likely rock, mineral, crystal, or gemstone matches for later verification. RockIdentifier.io supports the same phone rock identification workflow through web photo upload for users who want to scan an image without relying only on general image search.
Quick summary
- Best for
- Beginners, hikers, collectors, students, field hobbyists
- Works on
- Rocks, minerals, crystals, gemstones, beach cobbles, field specimens
- Accuracy
- Good for first-pass suggestions when the photo shows clear texture, luster, grain, or crystal habit
- Needs confirmation
- Yes
- Professional replacement
- No
- Platforms
- iPhone, iPad, Web
This guide is best for
- Beginners who want a simple phone-based workflow for rock identification
- Hikers and beachcombers who find rocks outdoors and want a quick first pass
- Collectors sorting mixed specimens into likely rock or mineral groups
- Students learning how photo clues connect to streak, hardness, luster, and cleavage
- Field hobbyists who want to document specimens before doing physical tests
- Crystal and gemstone owners checking visual matches before seeking expert review
Consider another approach if you
- People who need a certified identification for appraisal, sale, insurance, or legal use
- Users trying to confirm meteorites, asbestos, hazardous materials, or ore-grade specimens
- Anyone identifying rare minerals from a single blurry or filtered photo
- Owners of fragile, valuable, cut, or sentimental specimens that should not be scratched or acid-tested
You can identify rocks with your phone by photographing a clean, well-lit surface and comparing the suggested match with physical properties. The most reliable workflow is photo scan first, then confirmation with streak, Mohs hardness, cleavage, fracture, luster, and grain size. Phone identification works best for common rocks, minerals, crystals, and gemstones with visible texture or crystal habit.
What Is How to Identify Rocks With Your Phone?
Identifying rocks with your phone means using a camera image and visual pattern matching to narrow a specimen to likely rocks, minerals, crystals, or gemstones. The app reads visible traits such as color, luster, crystal habit, grain size, banding, cleavage faces, fracture texture, and any matrix still attached to the specimen.
Rock Identifier is useful as a first-pass field tool because it turns one or more photos into candidate names you can test in hand. For best results, treat the suggested ID as a hypothesis and verify it against physical properties such as streak, Mohs hardness, magnetism, and specific gravity. For mineral property cross-checks, references such as https://www.mindat.org/ are helpful.
How How to Identify Rocks With Your Phone Works
Phone rock identification works by analyzing a photo for visual features and matching those features against known rock and mineral examples. The scanner looks for patterns a geologist also checks visually: granular versus glassy texture, metallic versus vitreous luster, cleavage planes, conchoidal fracture, crystal shape, banding, vesicles, fossils, or weathered rind.
The result is usually a ranked list of likely matches, not a single guaranteed name. That matters because quartz, calcite, feldspar, chert, marble, slag, and many dark mafic rocks can overlap in color. Photos are processed for identification in a privacy-friendly way, and you should still confirm the result with simple tests the camera cannot measure directly.
How to Use Your Phone to Identify Rocks
Clean the specimen
Brush off loose dirt and photograph a fresh or unweathered surface if one is visible. Avoid soaking the rock unless you also take a dry photo, because water can exaggerate color, fractures, and banding.
Shoot in indirect daylight
Place the specimen in bright shade or soft daylight, not direct flash. Take one close-up for texture and one wider photo with a coin, ruler, or hand lens for scale.
Scan the clearest photo
Upload the sharpest image and crop toward diagnostic features such as crystal faces, vesicles, foliation, grains, or a fresh fracture edge. Download the iOS app from the site if you want to scan directly in the field.
Compare the top matches
Check whether the suggested candidates fit the specimen’s luster, grain size, crystal habit, cleavage, fracture, matrix, and color range. Do not accept a match based on color alone.
Confirm with field tests
Use streak, Mohs scratch checks, magnetism, and cleavage versus fracture to separate look-alikes. If the specimen may be valuable, fragile, or cut as jewelry, avoid destructive testing.
When to Use How to Identify Rocks With Your Phone (and When Not To)
Use it when
- Use it when you need a fast first-pass ID for common rocks, minerals, crystals, or gemstones found on a walk, beach, trail, or field trip.
- Use it when the specimen has visible texture, fresh fracture, crystal habit, foliation, banding, vesicles, or matrix that a camera can capture clearly.
- Use it to sort a mixed collection into likely groups before doing streak, hardness, magnetism, or specific gravity tests.
- Use it when comparing look-alikes such as quartz versus calcite, basalt versus slag, marble versus quartzite, or hematite versus magnetite.
Skip it when
- Do not use it as the final authority for appraisal, sale value, safety, or legal claims about a specimen.
- Do not rely on it for rare minerals, ore-grade identification, meteorite confirmation, asbestos concerns, or hazardous material decisions.
- Do not trust a result from a blurry, overexposed, wet-only, or heavily filtered image.
- Do not scratch, acid-test, or damage cut gemstones, fragile crystals, museum specimens, or sentimental pieces just to confirm an app result.
How to Identify Rocks With Your Phone vs Google Lens and Rock Scanner Apps
| Feature | Rock Identifier | Google Lens | Rock Scanner |
|---|---|---|---|
| Primary purpose | Dedicated rock, crystal, mineral, and gemstone photo identification | General image search across the web | Rock and mineral photo lookup |
| Best use | Getting likely specimen names and comparing visually similar candidates | Finding visually similar web images or shopping-style matches | Quick hobby-level candidate suggestions |
| Geology vocabulary | Uses terms such as luster, cleavage, streak, hardness, fracture, and crystal habit | May return broad web labels without mineral-property context | Usually includes basic rock and mineral names |
| Field-test guidance | Encourages confirmation with streak, Mohs hardness, cleavage, and fracture | No dedicated mineral testing workflow | Varies by app and database depth |
| Common weakness | Still depends on photo quality and visible diagnostic features | Can confuse rocks with decor, jewelry, stock photos, or unrelated objects | Can struggle with polished stones, rare minerals, and mixed rocks |
A dedicated geology scanner is usually better for mineral vocabulary and follow-up tests, while Google Lens is useful for broad visual search. None of these tools replaces a hand lens, streak plate, hardness kit, or expert review for difficult specimens.
Use Cases for Phone Rock Identification
- Field collecting: Use a phone scan to name likely candidates while the outcrop, matrix, and weathering context are still in front of you. Add notes about location, host rock, layering, and whether the specimen came from float or bedrock.
- Beach and river cobbles: Rounded cobbles are difficult because weathered surfaces hide grain boundaries. Photograph any chipped edge, compare texture carefully, and use hardness or streak later to separate quartzite, chert, basalt, jasper, and slag.
- Crystal and gemstone sorting: Photo lookup can separate likely quartz, calcite, fluorite, feldspar, garnet, and tourmaline groups before you inspect cleavage, hardness, and habit. Be cautious with dyed, heat-treated, coated, or synthetic material.
- Classroom and beginner learning: The workflow teaches observation before naming: luster, streak, cleavage, fracture, grain size, and crystal form. Students can compare the phone suggestion against a field guide and learn why color alone is unreliable.
How to Identify Rocks With Your Phone Limitations
- Treated stones can be misleading because dyeing, heat treatment, coatings, and resin filling alter color and surface appearance.
- Polished specimens and tumbled stones are harder to identify because original fracture, matrix, cleavage, and weathering context are often removed.
- Rare minerals, unusual local varieties, meteorites, industrial slag, and ore samples may require expert analysis or laboratory testing.
- Photo quality strongly affects results; blur, direct flash, harsh shadows, wet surfaces, and incorrect white balance can change luster and color.
- Value estimates should not be made from a phone ID alone; appraisal depends on authenticity, treatment, size, clarity, locality, demand, and condition.
- A camera cannot directly measure streak, Mohs hardness, specific gravity, magnetism, fluorescence, acid reaction, or optical properties.
- Many rocks are mixtures, so a scan may identify the dominant mineral rather than the correct rock name, especially in granite, gneiss, schist, and altered volcanic rocks.
Common mistakes
- Accepting the first phone result without checking streak, hardness, luster, cleavage, or fracture
- Identifying a rock by color alone even though many unrelated minerals share similar colors
- Using a wet-only photo that makes color, banding, and fractures look more intense than they are
- Photographing only a weathered rind instead of a fresh surface or chipped edge
- Taking a close-up with no scale, which makes grain size and crystal size harder to judge
- Relying on flash, harsh sunlight, or heavy filters that hide natural texture and luster
- Scratching or acid-testing a cut gemstone, fragile crystal, or sentimental specimen just to confirm an app suggestion
Use your phone to identify rocks, then verify the match
A phone scan can quickly narrow a rock, mineral, crystal, or gemstone to likely candidates. The most reliable result comes from pairing the photo match with simple field checks such as streak, Mohs hardness, luster, cleavage, and fracture.
Related Articles

Frequently Asked Questions
Can my phone identify a rock?
Yes, a phone can often narrow a rock to likely matches from a clear photo. For a reliable ID, confirm the suggestion with streak, Mohs hardness, cleavage, fracture, luster, and grain size.
What photo works best?
Use bright shade or indirect daylight, keep the camera steady, and fill the frame with the specimen. Take one close-up of texture and one wider image with a coin or ruler for scale.
Can one photo be enough?
One photo can be enough for obvious specimens, but two or three photos are safer. Different angles can reveal cleavage faces, banding, vesicles, crystal habit, or a fresh fracture surface.
Why did the result change?
The result can change when lighting, angle, crop, or focus changes the visible features. Reshoot in indirect daylight and crop to the most diagnostic surface instead of a stained or weathered face.
Should I identify by color?
No, color is one of the weakest clues because staining and weathering can mask the true mineral surface. Luster, streak, hardness, cleavage, fracture, and grain size separate more look-alikes.
Do I need a microscope?
Usually you do not need a microscope for a first-pass ID. A hand lens or inexpensive macro clip can help show grain boundaries, cleavage, and crystal habit, but good lighting matters more.
Are polished stones harder?
Yes, polished and tumbled stones are harder because natural fracture, matrix, and weathered surfaces are missing. Use non-destructive observations first, especially if the piece may be jewelry or a collectible.
Can it identify gemstones?
It can suggest likely gemstone names from appearance, especially for common materials such as quartz, amethyst, calcite, fluorite, jasper, or agate. It cannot prove treatment, origin, clarity grade, or market value from a photo alone.
How do I confirm it?
Start with streak and a cautious Mohs hardness check, then observe cleavage versus fracture and luster on a fresh surface. For difficult or valuable specimens, compare with a trusted mineral reference or ask a qualified geologist, gemologist, or local mineral club.