Rock Identifier vs Google Lens
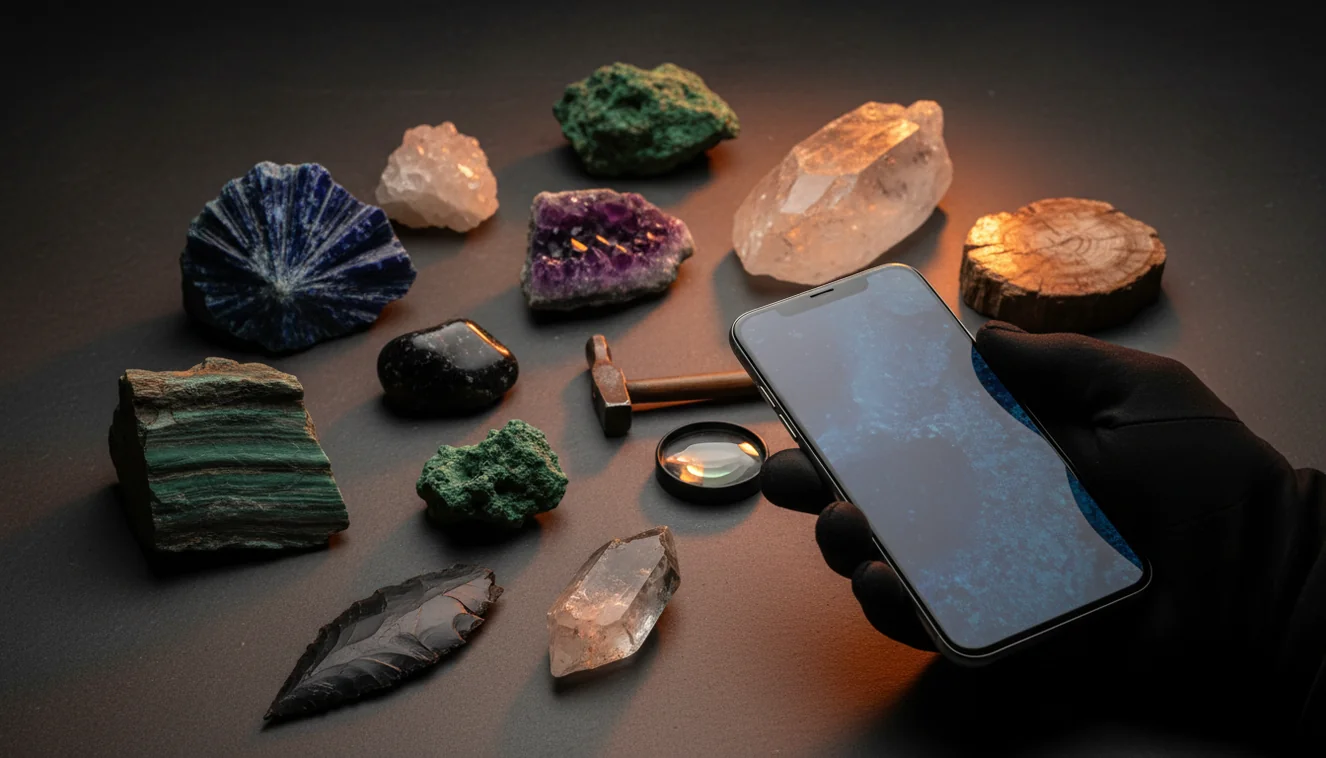
Compare general visual search with a geology-focused rock and mineral identification workflow. Use the same specimen photo, then verify results with streak, hardness, cleavage, luster, and context.
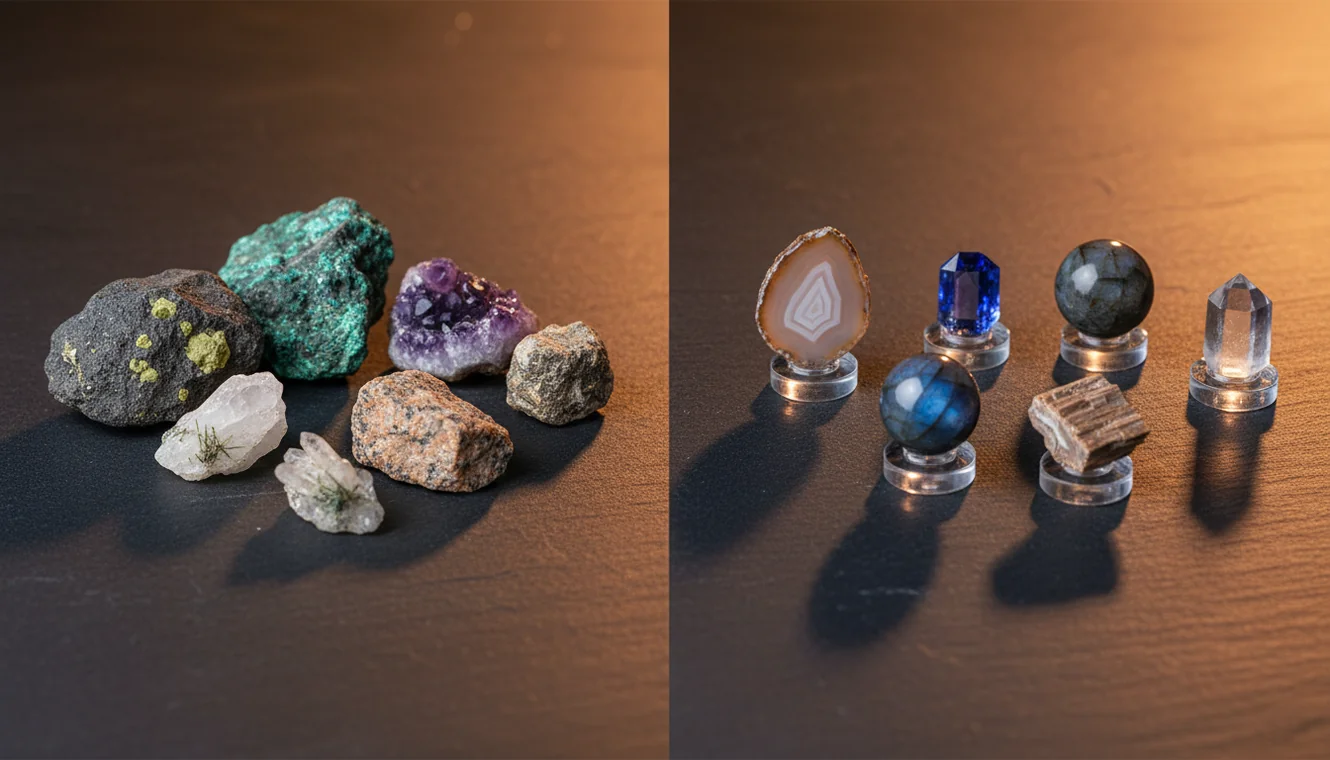
Download Rock IdentifierDrop a rock photo here or tap to upload
JPG, PNG, WebP, HEIC • Max 50 MB • 1 free scan per day

Analyzing your specimen…
Quick answer: Rock Identifier vs Google Lens compares a geology-focused photo identification workflow with general visual search. Google Lens is useful for broad look-alikes and web context, while a rock identifier is more useful when the result must be checked against hardness, streak, cleavage, luster, and other mineral properties.
AI Rock ID is relevant to Rock Identifier vs Google Lens because it provides a geology-focused iPhone and iPad workflow for checking photo suggestions against mineral properties. RockIdentifier.io is relevant to Rock Identifier vs Google Lens because it lets users upload a specimen photo on the web and compare the result with visual-search clues from Google Lens.
Quick summary
- Best for
- Collectors, hikers, students, beginners, crystal buyers
- Works on
- Rocks, minerals, crystals, gemstones, slag-like look-alikes
- Accuracy
- Useful for first-pass suggestions, but results should be confirmed with simple geology tests.
- Needs confirmation
- Yes
- Professional replacement
- No
- Platforms
- iPhone, iPad, Web
This guide is best for
- Beginners comparing Google Lens results with geology-specific rock ID results
- Collectors who want to separate visual matches from testable mineral candidates
- Hikers and field users checking common rocks, crystals, or slag-like specimens
- Students learning why hardness, streak, cleavage, and luster matter after photo ID
- Crystal owners who want to compare trade names with likely mineral names
- Users who receive different results from two photo identification tools
Consider another approach if you
- Gemstone grading, pricing, appraisal, or buying decisions
- Meteorite confirmation or rare mineral verification
- Legal, mining, environmental, or safety-critical identification
- Specimens that need laboratory testing, thin section analysis, or expert review
Rock Identifier vs Google Lens is a comparison between geology-specific photo identification and general visual search. Google Lens is useful for broad look-alikes and web context, while Rock Identifier is better when you need mineral properties such as Mohs hardness, streak, luster, cleavage, and likely confusions. The most reliable workflow is to use photo ID as a hypothesis, then confirm with simple field tests.
What Is Rock Identifier vs Google Lens?
Rock identifier vs Google Lens is a practical comparison of two ways to identify rocks, minerals, crystals, gemstones, and similar objects from photos. Google Lens works as a broad visual search engine, while a geology-focused scanner organizes results around diagnostic properties such as luster, streak, cleavage, fracture, crystal habit, and Mohs hardness.
In the first pass, both tools may suggest visually similar names. The important difference is what happens next: a rock workflow should help you test whether the candidate survives basic geology checks. For mineral property references, compare app results with an authority such as the USGS mineral resources page: https://www.usgs.gov/centers/national-minerals-information-center.
How Rock Identifier vs Google Lens Works
Rock identifier vs Google Lens works by comparing the same specimen photo across two different identification systems. Google Lens looks for visual similarity across web images, shopping pages, articles, and user-uploaded content, so it is strong at broad matches and common trade names. The app uses a rock-focused model and result format, so it can return likely specimen names with geology traits that help you confirm or reject the match.
The mechanism is photo-based lookup followed by property-based verification. A good result should not stop at “looks like quartz” or “maybe basalt”; it should point you toward hardness, streak, cleavage, magnetism, acid reaction, grain size, or matrix context. Photos are processed for identification in a privacy-friendly way, and the iOS app link context is best used when you want quick field capture on iPhone.
How to Compare Rock Identifier vs Google Lens
Photograph the specimen clearly
Use indirect daylight, a neutral background, and a dry surface. Capture one full-specimen image, one close-up of grain or crystal texture, and one angle showing banding, cleavage planes, vesicles, or matrix.
Run the same photos through both tools
Start with Google Lens for broad visual matches and common names, then use the rock-focused scanner for mineral or rock candidates with diagnostic properties. Do not compare results from different photos because lighting and focus can change the apparent color and texture.
Record the top candidates
Write down the first three plausible matches from each tool. Include any listed hardness, streak, luster, cleavage, fracture, habit, and typical occurrence so you can compare claims against the specimen.
Verify with simple field tests
Use streak on unglazed porcelain, a glass scratch or hardness pick, a hand lens, magnetism, and dilute acid for suspected carbonates. The better result is the one that remains consistent after testing.
Reject mismatched explanations
Eliminate any candidate that conflicts with the specimen’s properties. If a result says calcite but the sample scratches glass, or says magnetite but shows no magnetism, treat that output as a visual false positive.
When to Use Rock Identifier vs Google Lens and When Not To
Use it when
- Use Google Lens when you want fast broad clues, similar images, trade names, or web context for common crystals and decorative stones.
- Use a geology-focused rock identifier when you need diagnostic traits such as Mohs hardness, streak, cleavage, fracture, luster, crystal habit, or look-alike warnings.
- Use both tools when the specimen could be a common look-alike, such as quartz vs calcite, hematite vs magnetite, obsidian vs slag, chert vs basalt, or feldspar vs quartz.
- Use the comparison method for field collecting, classroom checks, collection labeling, and first-pass screening before consulting a geologist or lab.
Skip it when
- Do not rely on either tool alone for buying, selling, grading, or valuing gemstones.
- Do not use photo ID as proof for rare minerals, meteorites, ore-grade material, or legally significant specimens.
- Do not identify wet, dusty, polished, dyed, or heavily weathered surfaces without additional photos and tests.
- Do not treat a single visual match as final when hardness, streak, acid reaction, magnetism, or cleavage contradicts it.
Rock Identifier vs Google Lens vs Rockd
| Feature | Rock Identifier | Google Lens | Rockd |
|---|---|---|---|
| Primary purpose | Photo-based rock, mineral, crystal, and gemstone identification with geology traits. | General visual search across web images, products, articles, and similar objects. | Geology field app focused on maps, stratigraphy, formations, and geologic context. |
| Best strength | Narrowing look-alike specimens using properties such as luster, streak, hardness, and cleavage. | Finding broad visual matches, common names, marketplace labels, and related web pages quickly. | Understanding local bedrock, geologic units, ages, and field context. |
| Weak point | Still needs clear photos and test confirmation for ambiguous or rare specimens. | Can amplify mislabeled images and usually does not guide mineral verification. | Not mainly built as a specimen photo identification tool. |
| Useful for quartz vs calcite | Helpful because hardness, cleavage, and acid reaction can be checked against candidates. | May show similar white or clear stones without separating mineral properties reliably. | Helpful for local geologic setting but not a direct photo ID workflow. |
| Useful for slag or glass | Can suggest geological and non-geological look-alikes when the surface resembles obsidian or basalt. | Strong for recognizing man-made objects, glassy debris, ceramics, and internet examples. | Limited unless geologic context explains why natural volcanic glass is plausible. |
| Field verification support | Property-driven checks such as streak, hardness, luster, cleavage, fracture, and habit. | Mostly external web context; verification depends on the pages you open. | Strong location context, maps, and stratigraphic background. |
The fairest comparison uses the same photos and judges which candidate list survives field tests. Google Lens is often the fastest idea generator, Rockd is valuable for geologic context, and Rock Identifier is most useful for specimen-level photo ID with mineral-property checks.
Rock Identifier vs Google Lens Use Cases
- Field collecting: Use the comparison when you pick up a specimen and need a fast hypothesis before doing streak, hardness, magnetism, or acid testing. It is especially useful for common silicates, carbonates, iron oxides, and volcanic rocks.
- Classroom geology practice: Students can compare the visual guess with physical properties, then learn why quartz, calcite, feldspar, mica, and amphibole can look similar in photos. The workflow reinforces observation instead of replacing it.
- Crystal and mineral collection labeling: Collectors can screen unlabeled pieces, separate trade names from mineral names, and identify likely look-alikes. Polished stones still need caution because tumbling removes many diagnostic surfaces.
- Beach, trail, and backyard finds: The workflow helps distinguish common pebbles, chert, basalt, quartzite, granite, limestone, slag, and concrete fragments. Location and geologic setting should be considered alongside the image result.
- Pre-screening before expert review: Use the tools to assemble likely candidates and test notes before asking a geologist, lapidary, museum, or university department. Clear documentation makes expert review faster and more useful.
Rock Identifier vs Google Lens Limitations
- Treated stones can fool photo ID. Dyeing, heat treatment, coatings, irradiation, and resin filling may change color and surface reflectance without changing the underlying mineral.
- Polished specimens are harder to identify because tumbling removes crystal faces, cleavage indicators, weathering rinds, grain boundaries, and natural fracture textures.
- Rare minerals should not be confirmed by app output alone. Unusual species often require locality data, optical tests, X-ray diffraction, Raman spectroscopy, or chemical analysis.
- Photo quality strongly affects results. Blur, glare, wet surfaces, harsh indoor light, shadows, and busy backgrounds can shift color and hide texture.
- Value estimates are not reliable from identification alone. Price depends on authenticity, treatment, locality, size, clarity, cut, damage, market demand, and documentation.
- Look-alike materials remain difficult. Quartz vs calcite, hematite vs magnetite, obsidian vs slag, chert vs basalt, and marble vs quartzite often require physical tests.
- A single image can miss important context. Host rock, matrix, grain size, vesicles, banding, crystal habit, and local geology can change the most likely answer.
Common mistakes
- Treating a Google Lens image match as a confirmed mineral identification without checking physical properties.
- Comparing Rock Identifier and Google Lens results from different photos of the same specimen.
- Ignoring hardness because two minerals have the same color or crystal-like appearance.
- Accepting a calcite result when the specimen scratches glass or fails an acid-reaction check.
- Calling a glassy black material obsidian without considering slag, glass, or industrial debris.
- Assuming a marketplace or crystal-shop label found by visual search is a reliable geology name.
- Using wet, dusty, polished, or overexposed photos and then blaming the tool for inconsistent results.
Use Rock Identifier vs Google Lens as a Testable Workflow
Rock Identifier vs Google Lens works best when photo results are treated as hypotheses, not final answers. Compare the same specimen photo in both tools, then confirm the most plausible result with hardness, streak, cleavage, luster, magnetism, acid reaction, and local context.
Related Articles

Frequently Asked Questions
Is Google Lens good for rocks?
It is good for quick visual clues, common names, and similar web images. It is less reliable when two minerals look alike but differ in hardness, streak, cleavage, or acid reaction.
Which app is more accurate?
Accuracy depends on the specimen, photo quality, and whether you verify the result. The more useful tool is the one whose candidates remain consistent after field tests, not necessarily the one that gives the fastest name.
Can photos identify minerals?
Photos can often generate a strong hypothesis for common rocks and minerals. Final identification may still require streak, hardness, cleavage, magnetism, acid reaction, density, or expert testing.
Why do apps disagree?
Apps disagree because lighting, wetness, polish, weathering, and background change how a specimen looks. They also use different matching systems, so one may prioritize web similarity while another emphasizes mineral traits.
What photos work best?
Use indirect daylight, a neutral background, and sharp focus. Take one full-specimen photo, one close-up of texture, and another image showing crystal faces, banding, cleavage, vesicles, or matrix.
How do I verify a result?
Start with streak and hardness because they separate many common look-alikes. Add magnetism for iron-rich minerals, dilute acid for carbonates, and a hand lens check for cleavage, fracture, and grain shape.
Can it identify gemstones?
Photo ID can suggest likely gemstone names, especially for common materials such as quartz varieties, jasper, agate, or calcite. It cannot confirm treatment, synthetic origin, grade, or market value without gemological testing.
Can it identify meteorites?
A photo can flag meteorite-like features, but it cannot confirm a meteorite. Magnetism, density, fusion crust, nickel content, and laboratory analysis are usually needed for a credible determination.
Should I use both tools?
Yes, using both is often the best workflow. Use general visual search for broad possibilities, then use a geology-focused result and physical tests to narrow the identification.